Plump Turkey Gnome Crochet Shelf Sitter Free Thanksgiving Pattern
Reader Favorites











Mini Cocoa Mug Crochet Car Charm Free Christmas Pattern

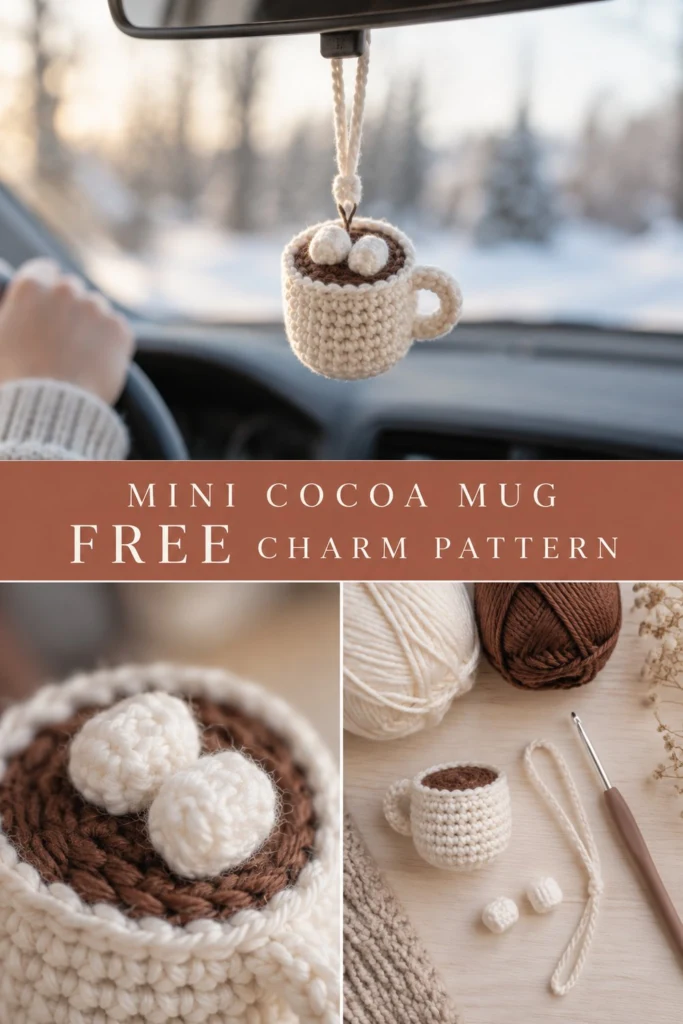
Add a little handcrafted warmth to your daily commute with this adorable mini cocoa mug hanging proudly from your rearview mirror. Worked in sturdy cotton yarn, it holds its shape effortlessly while bringing a smile to your face on frosty winter mornings.
Mini Cocoa Mug Crochet Car Charm Free Christmas Pattern
Quick Facts
- Skill level: Intermediate
- Finished size: 2 inches tall by 2 inches wide (excluding handle)
- Yarn: Sport weight cotton yarn in Cream, Brown, and White
- Hook: 2.5 mm (C/2) crochet hook
- Stitches used: ch, sc, inc, dec, sl st, BLO, FLO
- Time to make: 2 to 3 hours
Size customization tips are included further down.
What Makes This Mini Cocoa Mug Special
This charming design relies on traditional amigurumi techniques scaled down to pocket size. Working the mug body in continuous single crochet spirals creates a dense, sturdy fabric that securely holds its polyester stuffing without gaps. A clever back-loop-only round forms a sharp, clean base edge, while the cocoa surface is inset neatly at the top before two bobble-like marshmallows are stitched securely into place.
Skill Level
- Working in continuous spiral rounds
- Decreasing and invisible decreases
- Basic surface slip stitching and seaming
- Attaching small dimensional parts securely
Don’t worry if you are new to small amigurumi; the stitch counts are simple and clear.
Finished Measurements
| Dimension | Inches | Centimeters |
|---|---|---|
| Height | 2.0 in | 5.0 cm |
| Width (without handle) | 2.0 in | 5.0 cm |
| Diameter | 2.0 in | 5.0 cm |
Materials You Will Need
| Color | Yarn Type | Yards | Meters |
|---|---|---|---|
| Cream | Sport weight 100% cotton | 25 yds | 23 m |
| Brown | Sport weight 100% cotton | 10 yds | 9 m |
| White | Sport weight 100% cotton | 10 yds | 9 m |
- Hook: 2.5 mm (C/2) crochet hook
- Notions: Polyfill stuffing, yarn needle, stitch marker, scissors, 12 inches of cream yarn for hanging cord
Yarn Suggestions
| Yarn Line | Skein Yardage | Notes |
|---|---|---|
| Schachenmayr Catania | 137 yds per 50g | Excellent stitch definition, zero fuzz |
| Hobbii Friends Cotton 8/4 | 170 yds per 50g | Wide color range, great durability |
⚠️ Note: Avoid fuzzy acrylic or novelty yarns for this project. Smooth cotton yarn provides the crisp stitch definition and firm structure needed to keep the mug shape intact.
Gauge
- Gauge: 24 sts x 26 rows = 4 in / 10 cm in single crochet
- Circle gauge: Rnds 1 to 6 of the flat mug base = 2.0 in / 5.0 cm across
Abbreviations
- ch: chain
- sc: single crochet
- inc: single crochet increase (2 sc in one st)
- dec: invisible single crochet decrease
- sl st: slip stitch
- BLO: back loop only
- FLO: front loop only
- st(s): stitch(es)
- Rnd: round
- [ ]: repeat instructions between brackets
UK: sc = dc, hdc = htr, dc = tr.
Special Stitches Explained
- Magic Ring: Form a loop with working yarn, insert hook through center, yarn over, pull up a loop, and ch 1 to secure.
- Invisible Decrease (dec): Insert hook into the front loop only of the next two stitches, yarn over, pull through both front loops, yarn over, and pull through remaining two loops on hook.
Pattern Instructions
💡 Designer Tip: Use a stitch marker at the start of every round to keep track of your spiral. Do not join rounds unless specifically instructed.
Section 1: Mug Body (Cream, make 1)
Rnd 1: With Cream, start 6 sc in a magic ring (6 sc)
Rnd 2: [inc] x 6 (12 sc)
Rnd 3: [1 sc, inc] x 6 (18 sc)
Rnd 4: [2 sc, inc] x 6 (24 sc)
Rnd 5: [3 sc, inc] x 6 (30 sc)
Rnd 6: Working in BLO, sc in each st around (30 sc)
Rnds 7 to 14: sc in each st around (30 sc)
Rnd 15: Working in FLO, sl st in each st around (30 sl st). Fasten off Cream, weave in end.
Section 2: Cocoa Insert (Brown, make 1)
Rnd 1: With Brown, start 6 sc in a magic ring (6 sc)
Rnd 2: [inc] x 6 (12 sc)
Rnd 3: [1 sc, inc] x 6 (18 sc)
Rnd 4: [2 sc, inc] x 6 (24 sc)
Rnd 5: [3 sc, inc] x 6 (30 sc)
Fasten off Brown, leaving a 12-inch tail for sewing.
✅ Checkpoint: Stuff the mug firmly with polyfill up to Rnd 14. Place the Brown cocoa insert across the top opening, matching the 30 stitches of Rnd 5 to the remaining back loops of the mug rim, and whipstitch around while adding a little extra stuffing underneath if needed before closing completely.
Section 3: Handle (Cream, make 1)
Row 1: Ch 8, sc in 2nd ch from hook and in each ch across (7 sc). Fasten off, leaving an 8-inch tail for sewing.
Section 4: Marshmallows (White, make 2)
Rnd 1: With White, start 5 sc in a magic ring (5 sc)
Rnd 2: sc in each st around (5 sc)
Rnd 3: [dec] x 2, 1 sc (3 sc)
Fasten off, leaving a short tail. Pull tail through remaining stitches to close, and secure.
Assembly
- Handle Attachment: Sew the two ends of the handle vertically onto the side of the mug body between Rnds 8 and 13, keeping about 4 stitches of space between the top and bottom attachment points.
- Marshmallow Placement: Position the two white marshmallows slightly overlapping on top of the brown cocoa surface. Secure them firmly with small stitches using white yarn tails.
- Hanging Cord: Fold a 12-inch strand of Cream yarn in half, pull the folded loop securely through the top center of the cocoa insert, and knot the ends together to form your car charm loop.
Finishing
Weave in all remaining loose yarn ends inside the mug body before closing the cocoa insert. Check that all facial elements or attachments are secure.
Size Customization Tips
To make a slightly larger mug, continue the base increase rounds up to [4 sc, inc] x 6 (36 sc), add two extra straight body rounds, and work a correspondingly larger cocoa circle.
Care Instructions
Spot clean gently with a damp cloth and mild soap. Do not submerge fully in water to protect the inner polyfill shape.
FAQ
Can I use acrylic yarn instead of cotton?
Cotton yarn is strongly recommended because it produces minimal fuzz and holds a crisp, clean mug shape under tension. Acrylic may stretch or pill over time in a warm car.
How do I adjust the hanging loop length?
Simply tie your starting hanging cord knot higher or lower depending on how low you want the charm to hang from your rearview mirror.
Is this car charm safe for babies?
This charm is designed as a decorative vehicle accessory, not a toy. If adapting it into a toy for young children, omit the hanging cord and securely embroider all facial or decorative features.
Happy Crocheting!
I hope you enjoyed making your mini cocoa mug car charm! Be sure to save this pin on Pinterest and leave a comment below sharing what colors you used for your mug and marshmallows. Happy crocheting!
📄 Your free PDF pattern
⏳ Preparing your free PDF… 30s
Like this one? Save it for later.