Plump Turkey Gnome Crochet Shelf Sitter Free Thanksgiving Pattern
Reader Favorites











Sleepy Fox Crochet Plastic Bag Holder Free Crochet Pattern

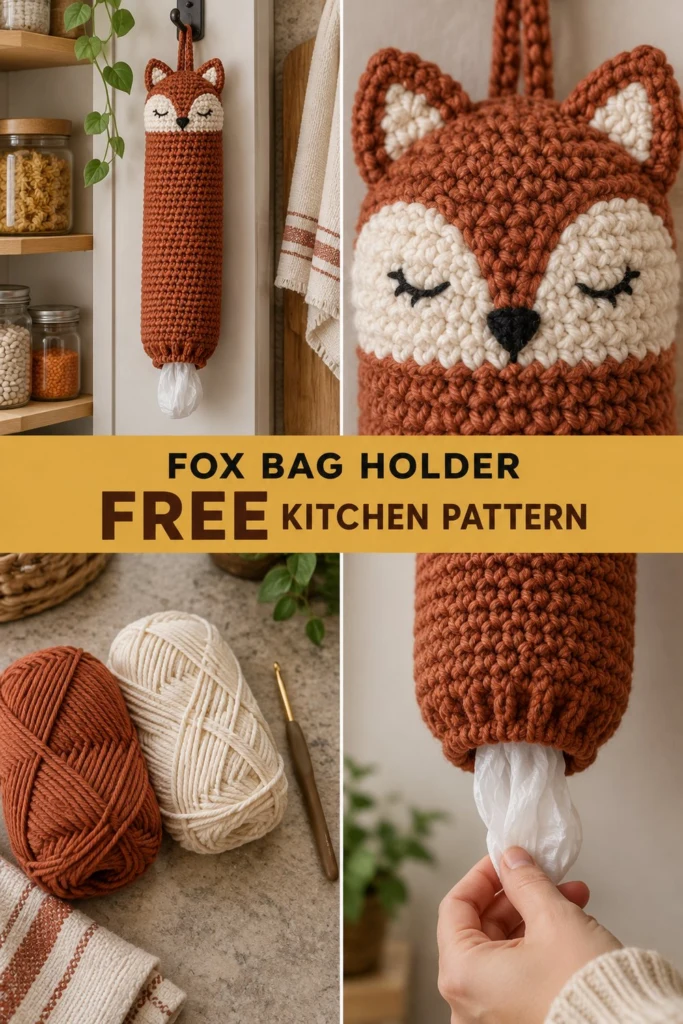
Every kitchen has that little drawer of plastic bags that somehow refuses to close, spilling grocery bags onto the floor every time you reach for a spatula. This sleepy fox bag holder takes care of that clutter by hanging neatly on your pantry door, swallowing bags at the top and handing them back through a stretchy opening at the bottom.
Sleepy Fox Crochet Plastic Bag Holder Free Crochet Pattern
Quick Facts
- Skill level: Intermediate
- Finished size: 5 inches wide by 21 inches long (flat)
- Yarn: Worsted weight cotton yarn in Rust and Cream
- Hook: 4.0 mm (US G/6) crochet hook
- Stitches used: ch, sc, inc, dec, sl st, BLO
- Time to make: 5 to 7 hours
Size customization tips and gauge adjustments are included further down in this guide.
What Makes This Crochet Kitchen Organizer Special
Working in continuous rounds gives the tube a smooth, seamless finish that holds its cylindrical shape without needing a plastic insert. The color-blocked face creates a charming woodland aesthetic, while the simple embroidery on closed eyes adds a peaceful, sleepy expression. An elastic-like ribbed opening at the bottom holds bags securely while making it easy to pull one out with a quick tug.
Skill Level
- Working in continuous spiral rounds
- Changing colors cleanly in single crochet
- Basic surface embroidery for facial features
- Following shaping for head and snout decreases
You will master this project in no time with our step-by-step instructions.
Finished Measurements
| Dimension | Inches | Centimeters |
|---|---|---|
| Width (Tube Diameter) | 5.0 in | 12.7 cm |
| Length (Top to Bottom Hem) | 21.0 in | 53.3 cm |
| Hanging Loop | 4.0 in | 10.2 cm |
Materials You Will Need
| Material / Color | Yarn Weight / Type | Yardage / Meters |
|---|---|---|
| Rust (Main Color) | Worsted / 100% Cotton | 280 yds / 256 m |
| Cream (Contrast Color) | Worsted / 100% Cotton | 80 yds / 73 m |
| Black (Scrap) | Embroidery Floss or Yarn | 5 yds / 5 m |
- Hook: 4.0 mm (US G/6) crochet hook
- Notions: Tapestry needle, stitch markers, polyester fiberfill (small amount for ears), scissors
Yarn Suggestions
| Yarn Line | Weight | Skein Yardage | Notes |
|---|---|---|---|
| Lily Sugar’n Cream | Worsted (4) | 120 yds / 109 m | Sturdy, holds shape well for home decor |
| Dishie by WeCrochet | Worsted (4) | 190 yds / 174 m | Smooth stitch definition, great color range |
| Premier Home Cotton | Worsted (4) | 140 yds / 128 m | Soft yet durable |
⚠️ Note: Avoid lightweight acrylic yarns for this project, as they stretch out under the weight of stored plastic bags. 100% cotton yarn provides the necessary structure and durability.
Gauge
- 16 sts x 18 rows = 4 inches in single crochet using a 4.0 mm hook.
- Rnds 1 to 6 of the flat circle = 2.0 inches across.
Abbreviations
| Abbreviation | Meaning |
|---|---|
| ch | chain |
| sc | single crochet |
| inc | increase (work 2 sc in the same st) |
| dec | decrease (sc2tog: insert hook in next st, yo, pull up lp, insert hook in following st, yo, pull up lp, yo, pull through all 3 lps) |
| sl st | slip stitch |
| BLO | back loop only |
| st(s) | stitch(es) |
| Rnd(s) | round(s) |
| Row(s) | row(s) |
| yo | yarn over |
| lp(s) | loop(s) |
UK terms equivalent: sc = dc, hdc = htr, dc = tr.
Special Stitches Explained
- Magic Ring: Wrap yarn around your left index finger twice to form a ring. Insert hook under both strands, pull up a loop, ch 1, and work the required number of sc into the ring. Pull the tail tight to close the center.
- Invisible Decrease (dec): Insert hook into the front loop only of the next stitch, then immediately insert hook into the front loop only of the following stitch. Yarn over and pull through both front loops, yarn over and pull through remaining two loops on hook.
Pattern Instructions
Pattern Notes:
– The body and tube are worked in continuous spiral rounds without joining. Use a stitch marker to keep track of the first stitch of each round.
– Color changes for the face are worked flat or in joined rounds as indicated.
Section 1: Hanging Loop (Rust, make 1)
Row 1: Ch 26, sc in 2nd ch from hook and in each ch across, turn (25 sc).
Rows 2 to 3: Ch 1, sc in each st across, turn (25 sc).
Fasten off, leaving a 12-inch tail for sewing. Fold the strip in half to form a loop and secure it to the top of the fox head later.
Section 2: Fox Head and Face (Cream and Rust, make 1)
The head is worked from the top down, beginning with the Cream face panel and transitioning into the Rust body.
Rnd 1 (Cream): Start 6 sc in a magic ring (6 sc).
Rnd 2: (inc) x 6 (12 sc).
Rnd 3: (1 sc, inc) x 6 (18 sc).
Rnd 4: (2 sc, inc) x 6 (24 sc).
Rnd 5: (3 sc, inc) x 6 (30 sc).
Rnd 6: (4 sc, inc) x 6 (36 sc).
Rnd 7: (5 sc, inc) x 6 (42 sc).
Rnd 8: (6 sc, inc) x 6 (48 sc).
Rnd 9: (7 sc, inc) x 6 (54 sc).
Rnds 10 to 14: sc in each st around (54 sc).
Switch to Rust yarn at the start of Rnd 15.
Rnds 15 to 22: sc in each st around (54 sc).
✅ Checkpoint: You should now have a wide cylinder forming the upper head and neck portion, measuring about 5 inches across.
Section 3: Body Tube (Rust, make 1)
Continuing directly from Rnd 22 of the head:
Rnds 1 to 65: sc in each st around (54 sc).
This creates the main holding chamber for the plastic bags.
Section 4: Bottom Hem and Stretchy Opening (Rust, make 1)
Rnd 1: Working in BLO, (7 sc, dec) x 6 (48 sc).
Rnd 2: (6 sc, dec) x 6 (42 sc).
Rnds 3 to 6: Work in alternating ribbing: 1 front post dc, 1 back post dc around (42 sts).
(Note: If working simpler ribbing, work alternating sc in FLO and BLO).
Fasten off and weave in all loose ends securely.
Section 5: Ears (Rust and Cream, make 2)
Rnd 1 (Cream): Start 4 sc in a magic ring (4 sc).
Rnd 2: (1 sc, inc) x 2 (6 sc).
Rnd 3: (2 sc, inc) x 2 (8 sc).
Switch to Rust yarn.
Rnd 4: (1 sc, inc) x 4 (12 sc).
Rnd 5: (2 sc, inc) x 4 (16 sc).
Rnd 6: (3 sc, inc) x 4 (20 sc).
Rnds 7 to 8: sc in each st around (20 sc).
Fasten off, leaving an 8-inch tail. Stuff lightly with a tiny pinch of fiberfill. Flatten the opening and sew the base closed.
Section 6: Assembly and Finishing
- Eyes: Using black embroidery floss or scrap yarn, embroider closed, sleepy arched eyes with eyelashes on the upper cream face panel between Rnds 8 and 11, centered about 8 stitches apart.
- Nose: Embroider a small triangle nose in black yarn right at the center meeting point of the cream face and rust body (around Rnd 14).
- Ears: Sew the two ears firmly to the top of the head along Rnds 2 to 5, angled slightly outward.
- Hanging Loop: Fold your crocheted hanging loop in half and stitch the ends securely to the very top center back of the head.
Size Customization Tips
- To make it longer: Simply add more rounds to Section 3 (Body Tube). Each additional 10 rounds adds about 2.2 inches of length to accommodate more bags.
- To make it wider: Start the head with 8 sc in the magic ring instead of 6, and increase your stitch count accordingly per round, maintaining the same final proportions.
Care Instructions
Machine wash gentle in cold water with similar colors. Lay flat to dry on a towel to preserve the cylindrical shape. Do not bleach or iron.
FAQ
Can I use acrylic yarn instead of cotton?
While you can, acrylic tends to stretch significantly once the holder fills up with heavy plastic bags. Cotton provides the structural rigidity needed to keep its shape.
How do I clean out the plastic bags?
Stuff your bags in through the wide top opening of the fox head, and pull them out one by one through the stretchy ribbed opening at the bottom!
Are safety eyes safe for a nursery?
For children’s rooms or areas where toys might be handled by toddlers, always embroider the facial features with yarn as written in this pattern rather than using plastic safety eyes.
Happy Crocheting!
I hope you love making your sleepy fox bag holder as much as I loved designing it! Be sure to save this pin on Pinterest to your crochet kitchen board and leave a comment below letting me know what colors you chose for your cute kitchen fox.
📄 Your free PDF pattern
⏳ Preparing your free PDF… 30s
Like this one? Save it for later.