Plump Turkey Gnome Crochet Shelf Sitter Free Thanksgiving Pattern
Reader Favorites











Ribbed Turtleneck Crochet Dickey Collar Free Crochet Pattern

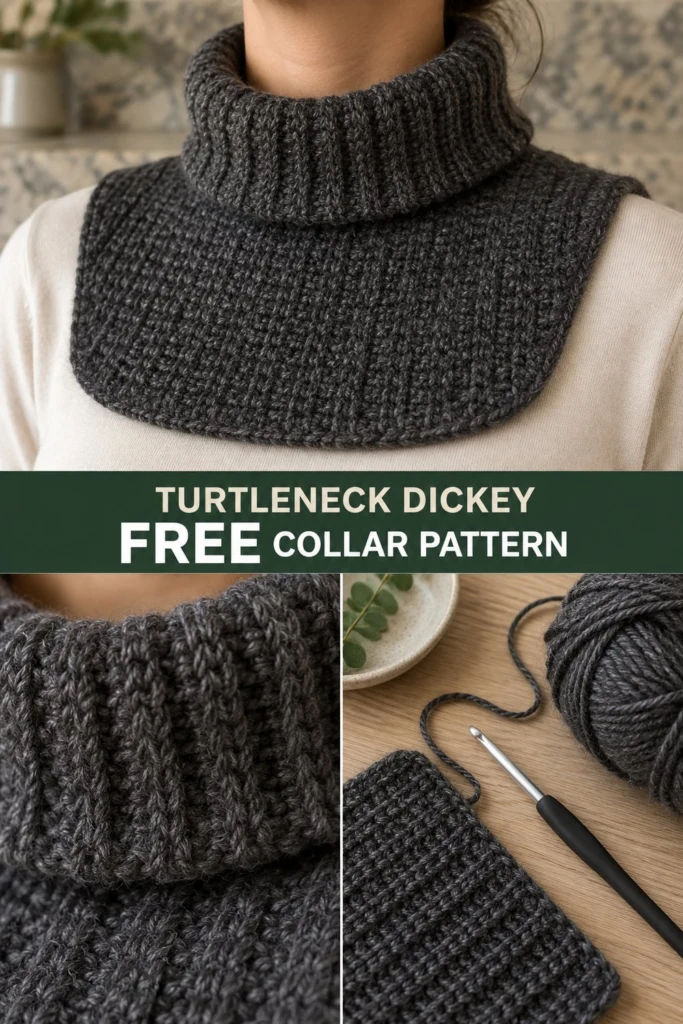
Slip on a cozy turtleneck dickey whenever the temperature drops and enjoy instant warmth without any bulky layers bunching up beneath your favorite sweaters and coats. The ribbed collar stretches comfortably around your neck, while the flat front and back panels lie smooth and sleek against your torso. It is a wonderfully quick winter accessory made with a single ball of yarn and a crochet hook.
Ribbed Turtleneck Crochet Dickey Collar Free Crochet Pattern
Quick Facts
- Skill level: Intermediate
- Finished size: One size fits most adults (XS to 2XL)
- Yarn: 1 ball of dark charcoal worsted weight yarn (approx. 220 yards / 200 meters)
- Hook: 5.5 mm (US I/9) crochet hook
- Stitches used: Ch, sl st, sc, hdc, blo
- Time to make: 3 to 4 hours
Size tips and customization options are included further down in the guide.
What Makes This Turtleneck Dickey Special
This clever layering piece solves the eternal winter wardrobe dilemma: how to get the classic look and cozy warmth of a turtleneck without overheating or adding bulk under tailored coats. The high neck is crafted entirely in vertical back-loop-only ribs that hug your throat with natural elasticity, while the lower panels transition smoothly into a flat, wide shape that sits invisibly under clothing. Working in rows and continuous sections keeps construction simple yet yields a polished, professional finish.
Skill Level
- Working in rows and back loops only
- Maintaining even tension over long foundation chains
- Basic seaming and finishing techniques
- Reassurance: If you can manage single crochet in the back loops, you have all the skills needed to complete this pattern!
Finished Measurements
| Measurement | Inches | Centimeters |
|---|---|---|
| Neck Circumference (unstretched) | 16 inches | 40.5 cm |
| Neck Height | 5.5 inches | 14 cm |
| Front/Back Panel Width | 12 inches | 30.5 cm |
| Front/Back Panel Depth | 6.5 inches | 16.5 cm |
Materials You Will Need
| Item | Description | Quantity / Details |
|---|---|---|
| Yarn | Dark Charcoal Worsted Weight (Category 4) | 1 ball (approx. 220 yds / 200 m) |
| Hook | 5.5 mm (US I/9) crochet hook | 1 |
| Notions | Yarn needle, locking stitch markers, measuring tape | As needed |
Yarn Suggestions
| Brand | Line | Skein Yardage | Notes |
|---|---|---|---|
| Lion Brand | Wool-Ease | 197 yds / 180 m per skein | Excellent stitch definition and warmth (buy 2 balls just in case) |
| Caron | Simply Soft | 315 yds / 288 m per skein | Very soft sheen, 1 ball is plenty |
| Patons | Classic Wool Worsted | 210 yds / 192 m per skein | 100% wool for maximum warmth |
⚠️ Note: Avoid novelty, eyelash, or extremely fuzzy yarns for this project. They obscure the ribbing texture and make it difficult to locate your stitches.
Gauge
- 14 sts x 12 rows = 4 in / 10 cm in back loop single crochet.
- Check your gauge before starting to ensure the neck and panels fit correctly.
Abbreviations
- ch: chain
- sl st: slip stitch
- sc: single crochet
- hdc: half double crochet
- blo: back loop only
- st(s): stitch(es)
- rep: repeat
- sk: skip
- **t: ** turn
UK terms conversion: UK sc = US dc, UK hdc = US tr, UK dc = US dtr.
Special Stitches Explained
- Back Loop Only (BLO): Insert your hook under the back loop only of the designated stitch, leaving the front loop unworked. This creates a distinct horizontal ridge and adds elasticity to the fabric.
Pattern Instructions
Pattern Notes
- The turtleneck collar is worked flat in rows of ribbing, then seamed at the short edges to form a tube.
- The front and back panels are worked directly off the lower edge of the collar or attached separately. For this pattern, we work the body panels outward from the base of the collar.
- Turning chains do not count as stitches unless explicitly noted.
Section 1: Turtleneck Collar (Dark Charcoal, make 1)
Row 1: Ch 21, working in the 2nd ch from hook, sc in each ch across, t (20 sc).
Row 2: Ch 1, working in blo, sc in each st across, t (20 sc).
Rows 3 to 46: Rep Row 2 forty-four times, ending with a total of 46 ribbed rows. Do not fasten off.
Bring the first and last rows together to form a ring, and slip stitch the short ends closed through both thicknesses to create the neck tube. Fasten off and weave in the tail.
✅ Checkpoint: Your collar should measure approximately 16 inches around and 5.5 inches tall when resting flat.
Section 2: Front Panel (Dark Charcoal, make 1)
With the collar seam positioned at the back, attach yarn to the lower edge of the collar across the front half (spanning 23 stitch rows/ribs).
Row 1: Working evenly across the lower edge of the front half of the collar, work 45 sc, t (45 sc).
Row 2: Ch 1, sc in first st, *hdc in next st, sc in next st* rep from * to * across, t *(45 sts: 23 sc, 22 hdc)*.
Row 3: Ch 1, hdc in first st, *sc in next st, hdc in next st* rep from * to * across, t *(45 sts: 22 sc, 23 hdc)*.
Rows 4 to 18: Rep Rows 2 and 3 alternately fifteen times.
Row 19: Ch 1, sc2tog, work in established pattern to last 2 sts, sc2tog, t (43 sts).
Row 20: Ch 1, sc across. Fasten off, leaving a 12-inch tail.
Section 3: Back Panel (Dark Charcoal, make 1)
Attach yarn to the remaining 23 stitch rows/ribs along the back lower edge of the collar.
Row 1: Working evenly across the lower edge of the back half of the collar, work 45 sc, t (45 sc).
Rows 2 to 20: Work identically to the Front Panel (Rows 2 to 20), shaping the bottom edges to match. Fasten off, leaving a 12-inch tail.
Assembly
Lay the finished dickey flat. Ensure the front and back panels hang evenly below the turtleneck collar. No side seaming is required, as the shoulders remain open to slip easily over the head.
Finishing
Weave in all remaining yarn ends securely using your yarn needle. Block lightly with steam or a damp pressing cloth if desired to relax the stitches and ensure the ribbed neck sits neatly.
Size Customization Tips
- Adjusting Neck Circumference: Each 2-row repeat of the collar ribbing adds approximately 0.7 inches to the neck opening. Add or subtract rows in pairs to fit your exact measurement.
- Adjusting Panel Length: To make the front and back panels longer to tuck further into coats, simply work additional repeats of Rows 2 and 3 before beginning the final decrease rows.
Care Instructions
Hand wash in cool water with mild wool detergent. Do not wring or twist. Lay flat on a clean towel and reshape to original dimensions while damp. Dry flat away from direct heat. Do not iron or bleach.
FAQ
Can I use cotton yarn instead of wool?
Yes, you can use a cotton or cotton-blend worsted yarn, but keep in mind that cotton has less natural elasticity than wool, so the turtleneck collar may feel slightly less springy.
How do I make the collar tighter or looser?
Simply adjust the starting chain length of the turtleneck section. Chain fewer stitches for a snugger fit against the throat, or add a few chains if you prefer a looser, slouchier cowl style.
Is this project suitable for absolute beginners?
While it uses basic stitches (single and half double crochet), maintaining even tension along row ends and working exclusively in back loops makes it best suited for adventurous beginners or intermediate crocheters.
Happy Crocheting!
I hope you love making and wearing your new turtleneck dickey! If you enjoyed this free pattern, be sure to save it on Pinterest and leave a comment below letting me know what color yarn you chose for your project.
📄 Your free PDF pattern
⏳ Preparing your free PDF… 30s
Like this one? Save it for later.