Reader Favorites
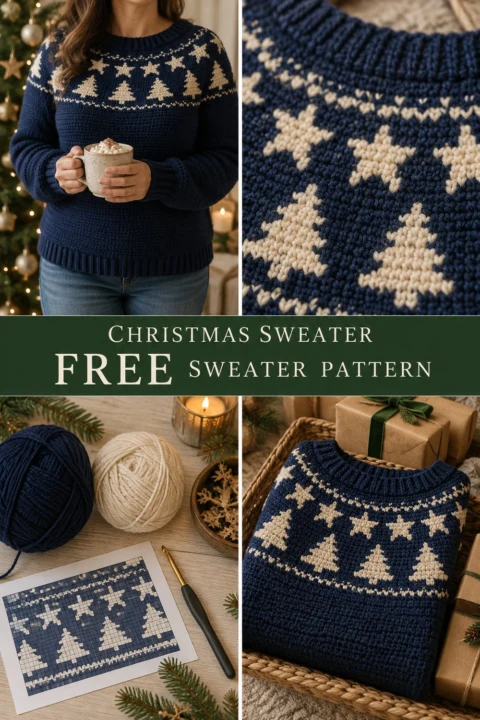
Slouchy Moss Stitch Crochet Pullover Sweater Free Crochet Pattern
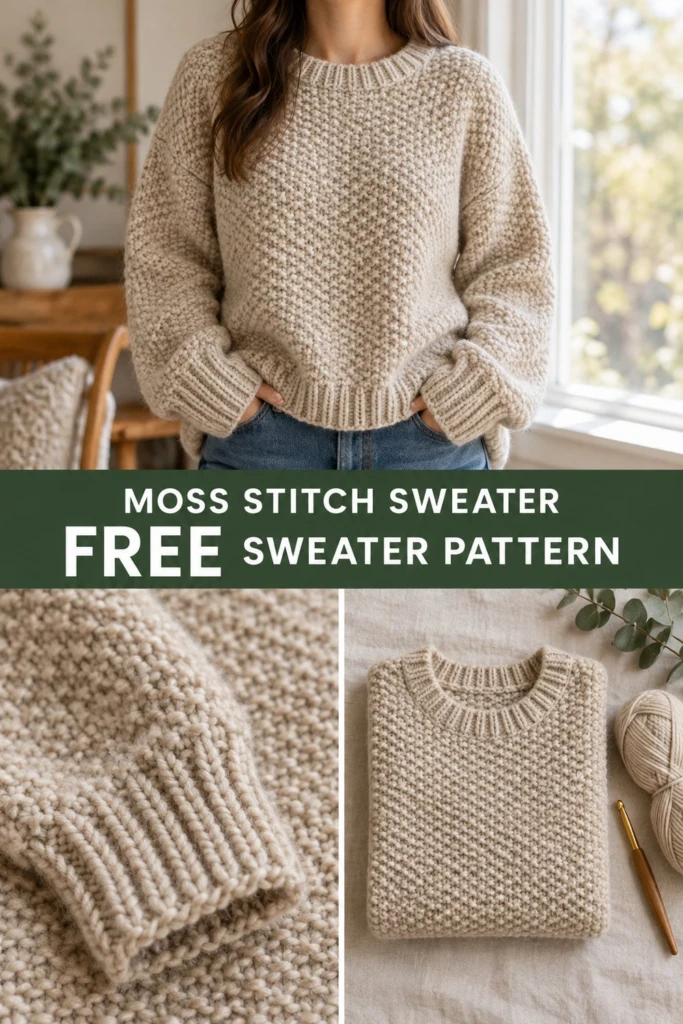
Craft a garment that looks straight off the boutique rack with this beginner-friendly drop-shoulder pullover. Featuring classic ribbed edgings and a stunning moss stitch texture worked flat in simple rectangles, this sweater is your passport to confident garment making.
Slouchy Moss Stitch Crochet Pullover Sweater Free Crochet Pattern
Quick Facts
- Skill level: Advanced Beginner
- Finished size: Sizes XS to 2XL (Bust: 36 [40, 44, 48, 52] inches)
- Yarn: Worsted weight (Medium #4) in Oatmeal
- Hook: 5.5 mm (US I/9) crochet hook
- Stitches used: Ch, sl st, sc, esc (extended single crochet / moss stitch foundation), post stitches (FPdc, BPdc)
- Time to make: Approximately 25–35 hours
💡 Designer Tip: Detailed size-by-size stitch counts and ease notes are included further down in the instructions to ensure a custom fit.
What Makes This Slouchy Moss Stitch Crochet Pullover Special
This sweater achieves its high-end, store-bought look through clever construction and classic textures. The body consists of four straightforward flat panels (front, back, and two sleeves) worked entirely in moss stitch to create a dense, stretchy fabric that drapes beautifully. Instead of awkward sloped shoulders or tricky armhole shaping, the drop-shoulder construction keeps panels rectangular and approachable for your first sweater project. Finally, post-stitch ribbing is worked directly onto the cuffs, hem, and neckline for a polished, professional finish.
Skill Level
- Required skills:
- Working flat in rows using moss stitch (alternating single crochet and chain stitches)
- Working in the round for cuffs, collar, and hem ribbing
- Picking up stitches cleanly along raw edges
- Basic seaming using a mattress stitch or whipstitch
- Reassurance: If you can master the simple rhythm of alternating single crochets and chain spaces, you have all the skills needed to complete this gorgeous sweater!
Finished Measurements
| Size | Bust Circumference (in / cm) | Length (in / cm) | Sleeve Length (in / cm) | Positive Ease Included |
|---|---|---|---|---|
| XS | 36 / 91.5 | 22 / 56 | 18 / 45.5 | +4 in / 10 cm |
| S | 40 / 101.5 | 23 / 58.5 | 18.5 / 47 | +4 in / 10 cm |
| M | 44 / 112 | 24 / 61 | 19 / 48.5 | +4 in / 10 cm |
| L | 48 / 122 | 25 / 63.5 | 19.5 / 49.5 | +4 in / 10 cm |
| 2XL | 52 / 132 | 26 / 66 | 20 / 51 | +4 in / 10 cm |
Materials You Will Need
| Material | Description | Quantity / Details |
|---|---|---|
| Yarn | Worsted Weight (#4) in Oatmeal | 1,200 (1,350, 1,500, 1,650, 1,800) yards / 1,097 (1,234, 1,371, 1,508, 1,645) meters |
| Crochet Hook | 5.5 mm (US I/9) | Or size needed to obtain gauge |
| Notions | Stitch markers | 4 locking stitch markers |
| Notions | Tapestry needle | For weaving in ends and seaming |
| Notions | Measuring tape | For checking dimensions |
Yarn Suggestions
| Yarn Line | Skein Yardage | Notes |
|---|---|---|
| Lion Brand Wool-Ease | 197 yds / 180 m per 85g skein | Excellent stitch definition, wonderful drape, and machine washable. |
| Caron Simply Soft | 315 yds / 288 m per 170g skein | Incredibly soft with a subtle sheen; budget-friendly option. |
| Knit Picks Brava Worsted | 218 yds / 200 m per 100g skein | Durable acrylic with a wide range of neutral oatmeal shades. |
⚠️ Note: Avoid novelty, fuzzy, or highly textured novelty yarns (such as eyelash or mohair blends) for this pattern. They will obscure the moss stitch texture and make it difficult to see your stitch placements.
Gauge
- Moss Stitch: 16 sts x 16 rows = 4 in / 10 cm using a 5.5 mm hook.
- Check your gauge: Swatch a 6-inch square in moss stitch. If your swatch is too small, switch to a larger hook. If it is too large, switch to a smaller hook.
Abbreviations
- ch: chain
- st(s): stitch(es)
- sl st: slip stitch
- sc: single crochet
- ch-1 sp: chain-1 space
- sk: skip
- rep: repeat
- RS: right side
- WS: wrong side
- FPdc: front post double crochet
- BPdc: back post double crochet
UK conversion note: UK sc = US dc, UK hdc = US tr, UK dc = US dtr.
Special Stitches Explained
- Moss Stitch (Granite Stitch): Worked over an even number of chains.
- *Row 1:* Sc in 4th ch from hook, *ch 1, sk 1 ch, sc in next ch; rep from * across, turn.
- *Row 2:* Ch 2 (does not count as st), sc in first ch-1 sp, *ch 1, sk next sc, sc in next ch-1 sp; rep from * across, working final sc into the turning chain space, turn.
- Post Stitch Ribbing (FPdc / BPdc):
- Work alternating rounds of Front Post Double Crochet and Back Post Double Crochet around the post of the stitches from the previous round to create stretchy, knitted-look ribbing.
Pattern Instructions
General Notes
- The sweater is worked in four separate flat rectangular panels: Back, Front, and two Sleeves.
- Panels are seamed at the shoulders and sides.
- Ribbing is worked directly onto the cuffs, bottom hem, and neckline edges after seaming.
- Sizes are written as XS (S, M, L, 2XL). When only one number is given, it applies to all sizes.
Section 1: Back Panel (Oatmeal, make 1)
- Foundation Ch: Ch 78 (86, 94, 102, 110).
- Row 1 (RS): Sc in 4th ch from hook (counts as first sc and ch-1 sp), *ch 1, sk 1 ch, sc in next ch; rep from * across, turn. *(76 [84, 92, 100, 108] sts)*
- Row 2: Ch 2, sc in first ch-1 sp, *ch 1, sk next sc, sc in next ch-1 sp; rep from * across, working final sc into top of turning ch, turn. *(76 [84, 92, 100, 108] sts)*
- Rrows 3 to 76 (78, 80, 82, 84): Rep Row 2. Fasten off, leaving a 12-inch tail for seaming.
✅ Checkpoint: Your Back Panel should measure approximately 19 [21, 23, 25, 27] inches wide and 19 [19.5, 20, 20.5, 21] inches long before adding the bottom hem ribbing.
Section 2: Front Panel (Oatmeal, make 1)
- Foundation Ch: Ch 78 (86, 94, 102, 110).
- Rows 1 to 66 (68, 70, 72, 74): Work exactly as established for Back Panel.
- Note: The front panel is slightly shorter than the back panel to accommodate the lowered front neckline shaping.
Neckline Shaping:
- Row 67 (RS): Work moss stitch across the first 26 (29, 32, 35, 38) sts. Turn, leaving remaining sts unworked for the neckline opening. (26 [29, 32, 35, 38] sts)
- Rows 68 to 76 (78, 80, 82, 84): Work moss stitch across shoulder sts, maintaining row count with Back Panel. Fasten off.
- Rejoin yarn at the opposite side of the neckline, leaving the center 24 (28, 30, 30, 32) sts unworked. Work to match the first shoulder. Fasten off.
Section 3: Sleeves (Oatmeal, make 2)
- Foundation Ch: Ch 46 (48, 50, 52, 54).
- Row 1 (RS): Sc in 4th ch from hook, *ch 1, sk 1 ch, sc in next ch; rep from * across, turn. *(44 [46, 48, 50, 52] sts)*
- Row 2: Ch 2, sc in first ch-1 sp, *ch 1, sk next sc, sc in next ch-1 sp; rep from * across, turn. *(44 [46, 48, 50, 52] sts)*
- Rows 3 to 60: Rep Row 2, working even in moss stitch. Fasten off, leaving a long tail for seaming.
Assembly
- Lay the Front and Back panels flat with right sides facing together.
- Seam the shoulder edges together using your tapestry needle and a mattress stitch, leaving the center 24 (28, 30, 30, 32) sts open for the head.
- Align the center of the Sleeve top edge with the shoulder seam. Pin the sleeve flat against the armhole edge. Seam the straight sleeve top to the body panel across approximately 7 (7.5, 8, 8.5, 9) inches down from the shoulder seam.
- Fold the sweater at the shoulder seams, matching front and back. Seam the underarm and side seams from the wrist cuff all the way down to the bottom hem.
Finishing & Edgings
Bottom Hem Ribbing:
- Rejoin yarn at the bottom corner of the sweater body.
- Rnd 1: Ch 2 (counts as first dc), work dc evenly spaced around the entire bottom hem edge, join with sl st to top of beg ch-2. (152 [168, 184, 200, 216] dc)
- Rnds 2 to 6: Ch 2, *FPdc around next st, BPdc around next st; rep from * around, join with sl st to top of beg ch-2. Fasten off and weave in ends.
Cuff Ribbing (Work on both sleeves):
- Rejoin yarn at the sleeve wrist opening.
- Rnd 1: Ch 2, work dc evenly around wrist opening, join with sl st to top of beg ch-2. (36 [38, 40, 42, 44] dc)
- Rnds 2 to 5: Ch 2, *FPdc around next st, BPdc around next st; rep from * around, join with sl st to top of beg ch-2. Fasten off.
Neckline Collar:
- Rejoin yarn at the shoulder seam of the neckline opening.
- Rnd 1: Ch 2, work dc evenly around the entire neckline collar opening, decreasing slightly at the front corners to prevent flaring, join with sl st to top of beg ch-2. (72 [76, 80, 80, 84] dc)
- Rnds 2 to 4: Ch 2, *FPdc around next st, BPdc around next st; rep from * around, join with sl st to top of beg ch-2. Fasten off.
- Weave in all remaining yarn tails securely with your tapestry needle. Block lightly with steam if desired to set the moss stitch drape.
Size Customization Tips
- Adjusting Length: Because the body is worked in simple rectangular panels, you can easily add or subtract rows in the moss stitch body sections before beginning the neckline or armhole shaping. Every 8 extra rows adds approximately 2 inches of length.
- Adjusting Width: The moss stitch is worked over an even number of foundation chains. To adjust the bust width, add or subtract chains in pairs of 2.
Care Instructions
- Hand wash cold or machine wash on a gentle wool/delicate cycle (max 30°C / 85°F) using mild wool detergent.
- Do not bleach or wring out.
- Lay flat on a clean towel to dry in the shade, reshaping gently to original measurements while damp.
- Do not iron or tumble dry.
Frequently Asked Questions
Can I use cotton yarn instead of acrylic or wool?
Yes, you can use a worsted weight cotton yarn, but keep in mind that cotton is heavier and has less natural elasticity than wool or acrylic. Your sweater will have a heavier drape and may stretch slightly more over time.
How do I modify this pattern for a more fitted look?
To create a more fitted silhouette, reduce the initial foundation chain count by 8 to 12 chains per panel and choose a size with less positive ease (e.g., closer to your exact bust measurement).
Is this pattern truly beginner-friendly?
Absolutely! If you understand the basic single crochet stitch and can maintain an even tension when chaining and skipping stitches, you can make this sweater. The drop-shoulder construction means zero complicated armhole shaping or curved seams.
Happy Crocheting!
I cannot wait to see your gorgeous finished sweaters! Be sure to save this pin to your favorite crochet boards on Pinterest so you can find it easily later. Leave a comment below sharing what color you decided to make yours in—happy making!
📄 Your free PDF pattern
⏳ Preparing your free PDF… 30s
Like this one? Save it for later.