Reader Favorites
Twisted Front Crochet Ear Warmer Headband Free Winter Pattern
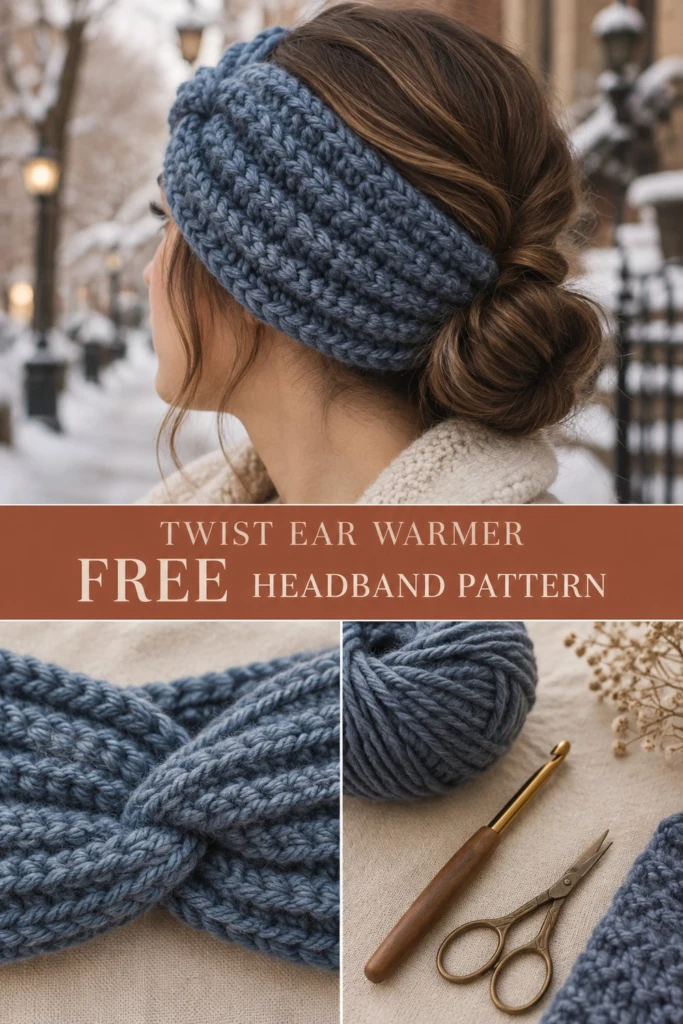
Hats are wonderful for keeping out the chill, but they have a habit of flattening your hair the moment you step indoors. This twisted front crochet ear warmer headband gives you the best of both worlds—it hugs your ears with cozy warmth while keeping your hairstyle completely intact.
Twisted Front Crochet Ear Warmer Headband Free Winter Pattern
Quick Facts
- Skill level: Easy Beginner
- Finished size: Teen / Small Adult (18-19 in head) and Average Adult (20-22 in head)
- Yarn: Chunky weight (Category 5) denim blue yarn
- Hook: 6.5 mm (US K/10.5) crochet hook
- Stitches used: ch, hdc, FPhdc, BPhdc, sl st
- Time to make: Approximately 1 to 1.5 hours
Size tips and adjustments are included further down in the guide.
What Makes This Ear Warmer Special
The secret to this winter crochet pattern is a clever combination of front post and back post half double crochet stitches, which mimic a knitted ribbed fabric with gorgeous elasticity. Working the ribbed band as one long straight strip means you do not have to worry about complex shaping or decreases. By folding the ends together into a simple interlocking stack and seaming them up, you create an instant, elegant twist right across the forehead.
Skill Level
- Basic crochet knowledge (chains, half double crochet)
- Familiarity with post stitches (front post and back post)
- Seaming a flat crocheted piece with a yarn needle
- Reassurance: If you can work basic half double crochets, you can easily master post stitches with just a little practice on your first row!
Finished Measurements
| Size | Head Circumference | Width (Height of Band) | Length (Before Seaming) |
|---|---|---|---|
| Teen / Small Adult | 18–19 in (46–48 cm) | 4.5 in (11.5 cm) | 18 in (46 cm) |
| Average Adult | 20–22 in (51–56 cm) | 4.5 in (11.5 cm) | 20 in (50 cm) |
Materials You Will Need
| Material / Item | Description / Color | Quantity / Amount |
|---|---|---|
| Yarn | Chunky weight (5) in Denim Blue | Approx. 110 (125) yds / 100 (114) m |
| Crochet Hook | 6.5 mm (US K/10.5) | 1 hook |
| Notions | Tapestry needle | 1 piece |
| Notions | Scissors | 1 pair |
| Notions | Stitch markers (optional) | 2 markers |
Yarn Suggestions
| Yarn Line | Weight | Skein Yardage | Notes |
|---|---|---|---|
| Lion Brand Hue + Me | Bulky (5) | 137 yds (125 m) per skein | Excellent stitch definition, wonderful denim blue shades |
| Caron Chunky Cakes | Bulky (5) | 297 yds (272 m) per skein | Soft acrylic with lovely bulky drape |
| Paintbox Yarns Simply Chunky | Chunky (5) | 149 yds (136 m) per ball | Budget-friendly acrylic with consistent texture |
⚠️ Note: Avoid using super-fine novelty yarns, cotton blends with zero elasticity, or roving-style unspun wools. Your ear warmer needs the springy bounce of acrylic or wool blends to hug your head snugly without sagging.
Gauge
- 11 stitches x 8 rows = 4 in (10 cm) in ribbed pattern using a 6.5 mm hook.
- Check your gauge: Crocheting too tightly will make the headband stiff, while too loose will make it floppy. Adjust your hook size if your swatch does not match.
Abbreviations
| Abbreviation | Meaning |
|---|---|
| ch | chain |
| st / sts | stitch / stitches |
| sl st | slip stitch |
| hdc | half double crochet |
| FPhdc | front post half double crochet |
| BPhdc | back post half double crochet |
| rep | repeat |
| RS / WS | right side / wrong side |
UK terms translation: sc = dc, hdc = htr, dc = tr. (This pattern uses US standard terminology).
Special Stitches Explained
- Front Post Half Double Crochet (FPhdc): Yarn over, insert your hook from front to back to front around the post of the specified stitch from the row below, yarn over and pull up a loop, yarn over and draw through all 3 loops on your hook.
- Back Post Half Double Crochet (BPhdc): Yarn over, insert your hook from back to front to back around the post of the specified stitch from the row below, yarn over and pull up a loop, yarn over and draw through all 3 loops on your hook.
Pattern Instructions
Pattern Notes:
– The turning chain 2 at the beginning of rows does NOT count as a stitch. Always place your first hdc in the very first stitch of the row.
– Negative ease is built into the lengths so the headband fits snugly against cold winter winds.
Section 1: Headband Strip (Denim Blue, make 1)
Row 1: Ch 14 (for both sizes), work 1 hdc in the 3rd ch from the hook (the skipped 2 ch do not count as a stitch), work 1 hdc in each remaining ch across, turn. (12 hdc)
Row 2 (RS): Ch 2 (does not count as st here and throughout), working in ribbing pattern across: *1 FPhdc around next st, 1 BPhdc around next st; rep from * to last 2 sts, 1 FPhdc, 1 hdc in top of turning chain, turn. *(12 sts)*
Row 3 (WS): Ch 2, 1 FPhdc around first st, *1 BPhdc around next st, 1 FPhdc around next st; rep from * to last st, 1 hdc in last st, turn. *(12 sts)*
Rows 4 to 36 (Teen / Small Adult): Repeat Rows 2 and 3 consecutively until your strip measures about 18 in (46 cm) unblocked, ending on a WS row. Do not fasten off yet.
OR
Rows 4 to 40 (Average Adult): Repeat Rows 2 and 3 consecutively until your strip measures about 20 in (50 cm) unblocked, ending on a WS row. Do not fasten off yet.
✅ Checkpoint: Lay your completed strip flat on a table. Count your side ridge lines to verify you have reached the exact row count for your chosen size. The band should measure 4.5 inches wide.
Section 2: Creating the Twisted Front
- Lay your long rectangular strip flat in front of you with the Right Side facing up.
- Fold both short ends inward toward the center so they meet, making a “C” shape or taco shell profile on each end.
- Interlock the two folded ends together like two interlocking letter “C” profiles (slide one folded half halfway inside the other fold so that all four fabric layers line up).
Section 3: Seaming
- Thread your tapestry needle with a 12-inch tail of denim blue yarn.
- Whipstitch securely straight across all four layers of the interlocking folds, going back and forth to ensure a strong, neat seam.
- Fasten off securely and weave in all loose yarn tails.
- Turn the headband inside out so the seam is pushed to the inside and the gorgeous twisted front pops out on the outside.
Size Customization Tips
- Adjusting Width: To make your ear warmer wider or narrower, start with any even chain length for your foundation row, keeping in mind that ribbing requires an even number of post stitch pairings.
- Adjusting Length: Because people’s heads vary slightly, wrap your unfinished strip around your head with light stretch before seaming. Add or subtract 2-row repeats as needed to hit your ideal fit.
Care Instructions
- Hand wash gently in cool water with mild wool detergent, or machine wash on a delicate wool cycle inside a mesh laundry bag.
- Lay flat on a clean towel to dry in its natural shape. Do not tumble dry, bleach, or iron directly over the textured ribbing.
FAQ
Can I use a different yarn weight for this easy crochet ear warmer?
Yes! You can use a worsted weight (Category 4) yarn with a 5.5 mm hook, but you will need to increase your initial foundation chain count to maintain the same 4.5-inch band width, and add extra rows to reach the correct head length.
How do I make this winter crochet pattern smaller for a child?
To scale this down for a young child, start with a foundation chain of 10 instead of 14, and work fewer total rows until the strip measures around 16 inches before twisting and seaming.
Is this twisted headband crochet pattern beginner-friendly?
Absolutely! While post stitches look intricate and knitted, they are simply worked around the body of the stitch rather than into the top loops. Once you finish Row 2, the pattern sequence naturally repeats itself.
Happy Crocheting!
I hope you enjoyed making this quick winter accessory! If you love how your denim blue twist headband turned out, be sure to save this free crochet pattern pin on Pinterest and leave a comment below letting me know what yarn color you chose.
📄 Your free PDF pattern
⏳ Preparing your free PDF… 30s
Like this one? Save it for later.