Reader Favorites
Cable Crochet Fingerless Mittens Free Winter Pattern
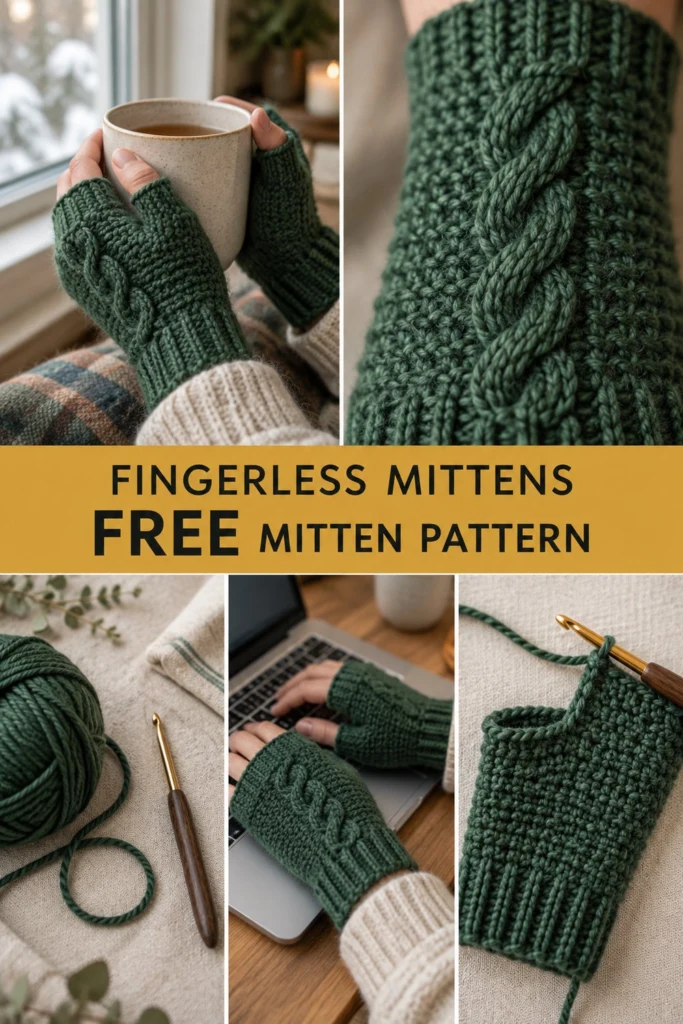
Typing, scrolling, and holding a hot drink are all easier with free fingers, and these cozy mitts keep your hands warm while leaving your fingertips entirely free. Worked in rich forest green yarn with a textured half double crochet body and a striking front post cable running up the back of the hand, they are as lovely to hook as they are to wear.
Cable Crochet Fingerless Mittens Free Winter Pattern
Quick Facts
- Skill level: Intermediate
- Finished size: Small, Medium, Large (hand circumference: 6.5 [7.5, 8.5] inches)
- Yarn: Worsted weight yarn (approx. 150-180 yards)
- Hook: 4.5 mm (US 7) crochet hook
- Stitches used: ch, sl st, hdc, fpdc, fptr, hdc2tog
- Time to make: 4 to 6 hours
Size tips and customization details are included further down the page.
What Makes This Accessory Special
These fingerless mittens combine warmth and functionality with a seamless construction method. The thumb gap is formed simply by chaining over skipped stitches in a round, meaning there is zero picking up of stitches or sewing required later. The signature cable is worked directly into the top of the hand using front post stitches that catch the light and create a gorgeous, squishy braided texture.
Skill Level
- Working in the round and joining with slip stitches
- Front post double crochet and front post treble crochet stitches
- Skipping stitches to create a thumb opening
- Reading a simple cable placement sequence
Don’t worry if you haven’t tackled cables in crochet before; I will walk you through every twist!
Finished Measurements
| Size | Hand Circumference | Total Length | Recommended Ease |
|---|---|---|---|
| Small | 6.5 in / 16.5 cm | 7.0 in / 17.5 cm | 0.5 in negative ease |
| Medium | 7.5 in / 19.0 cm | 7.5 in / 19.0 cm | 0.5 in negative ease |
| Large | 8.5 in / 21.5 cm | 8.0 in / 20.5 cm | 0.5 in negative ease |
Materials You Will Need
| Item | Description | Quantity / Specs |
|---|---|---|
| Yarn | Forest Green Worsted Weight (#4) Yarn | 1 skein (approx. 200 yds / 183 m) |
| Hook | 4.5 mm (US 7) Crochet Hook | Standard ergonomic hook |
| Notions | Yarn needle for weaving ends | 1 tapestry needle |
| Notions | Stitch markers | 2 locking stitch markers |
Yarn Suggestions
| Yarn Line | Weight | Skein Yardage | Notes |
|---|---|---|---|
| Caron One Pound | Worsted (#4) | 812 yds / 742 m | Excellent stitch definition for cables |
| Lion Brand Wool-Ease | Worsted (#4) | 197 yds / 180 m | Adds lovely warmth and wool elasticity |
| Red Heart Super Saver | Worsted (#4) | 364 yds / 333 m | Budget-friendly with great color options |
⚠️ Note: Avoid novelty, eyelash, or extremely fuzzy yarns for this project. They will hide the cable stitches and make the front post texture disappear entirely.
Gauge
16 hdc x 12 rounds = 4 in / 10 cm using a 4.5 mm hook in standard half double crochet.
Abbreviations
- ch: chain
- sl st: slip stitch
- hdc: half double crochet
- dc: double crochet
- fpdc: front post double crochet
- fptr: front post treble crochet
- hdc2tog: half double crochet 2 together (decrease)
- st(s): stitch(es)
- sk: skip
- rep: repeat
- Rnd: round
- RS: right side
(UK terms note: sc = dc, hdc = htr, dc = tr).
Special Stitches Explained
- Front Post Cable (4-st cable cross): Sk 2 sts, work 1 fptr around each of the next 2 sts, then working behind those posts, work 1 fptr around each of the 2 skipped sts.
- Thumb Opening (Ch-gap): Ch a specified number of stitches, skip the exact same number of stitches in the round below, and resume stitching in the next stitch.
Pattern Instructions
Pattern Notes:
– The mittens are worked top-down starting from the cuff, or bottom-up starting from the wrist cuff ribbing. Here, we work from the wrist ribbing up toward the fingers.
– The ch 2 at the beginning of a round does not count as a stitch unless stated otherwise. Always join with a sl st to the first hdc of the round.
Section 1: Wrist Ribbing (Both Sizes, Make 2)
Row 1: Leaving a 6-inch tail for sewing, ch 9. Working in the back bumps of the foundation chain, 1 hdc in 3rd ch from hook (skipped 2 ch count as first hdc), 1 hdc in each of the remaining 6 chs, turn (8 hdc).
Rows 2 to 24 (28, 32): Ch 2, working in BLO only, 1 hdc in each st across, turn (8 hdc).
Bring the two short ends of the ribbing band together and sl st them closed through both thicknesses to form a circular cuff band. Do not fasten off; turn your work to begin working along the long edge of the ribbing.
Section 2: Hand and Cable Body (Make 2)
Rnd 1: Ch 2, work 28 (32, 36) hdc evenly distributed around the raw edge of the ribbing band, join with sl st to first hdc (28 [32, 36] hdc).
Rnds 2 to 3: Ch 2, work 1 hdc in each st around, join (28 [32, 36] hdc).
Rnd 4 (Cable Setup): Ch 2, hdc in next 10 (12, 14) sts, 4 fptr over the next 4 sts for the cable cross (sk 2 sts, fptr around next 2 sts, working behind those posts, fptr around the 2 skipped sts), hdc in remaining 14 (16, 18) sts, join (28 [32, 36] sts).
Rnds 5 to 6: Ch 2, hdc in next 10 (12, 14) sts, 1 fptr in next 4 cable sts, hdc in remaining 14 (16, 18) sts, join (28 [32, 36] sts).
Rnd 7: Rep Rnd 4 for the second cable crossing.
Section 3: Thumb Opening and Upper Hand (Make 2)
Rnd 8: Ch 2, hdc in next 10 (12, 14) sts, work 4 fptr cable, hdc in next 2 sts, ch 5 (skip 5 sts for thumb gap), hdc in remaining 7 (9, 11) sts, join (28 [32, 36] sts including chs).
Rnd 9: Ch 2, hdc in next 10 (12, 14) sts, work 4 fptr cable, hdc in next 2 sts, work 5 hdc into the ch-5 thumb gap space, hdc in remaining 7 (9, 11) sts, join (28 [32, 36] hdc).
Rnds 10 to 12: Ch 2, hdc in next 10 (12, 14) sts, work 1 fptr in next 4 cable sts, hdc in remaining 14 (16, 18) sts, join (28 [32, 36] sts).
Rnd 13: Rep Rnd 4 for final cable twist.
Rnds 14 to 15: Ch 2, hdc in each st around, join (28 [32, 36] hdc).
Fasten off yarn, leaving a short tail.
Section 4: Finger Edge Trim (Make 2)
Rnd 1: Join yarn with a sl st at the base of the fingers. Ch 1, work 1 round of loose slip stitches or crab stitch (reverse single crochet) around the top edge of the mitten for a clean finished look. Join and fasten off.
Assembly
- Thumb Cuffs: Join yarn to the base of the thumb opening. Ch 1, work 8 sc evenly around the thumb hole opening, join with a sl st, and fasten off.
- Weaving Ends: Thread all loose tails onto your tapestry needle and weave them securely into the wrong side of the fabric.
✅ Checkpoint: Check that your cable columns align straight up the back of the hand and that both thumb openings are positioned on the correct inner thumbs (left thumb hole on the right side of the left mitten when worn, and vice versa).
Finishing
Block your finished mittens lightly by dampening them and laying them flat to shape, ensuring the cables pop cleanly against the half double crochet background.
Size Customization Tips
- For a wider hand: Add extra half double crochet stitches on either side of the cable panel in Rnds 1 through 3, ensuring you maintain a multiple that fits your gauge.
- For longer fingers: Continue working straight hdc rounds (repeating Rnds 14 to 15) for 1 or 2 extra rounds before adding the final top trim.
Care Instructions
Hand wash in cool water with mild wool detergent. Lay flat to dry on a towel, reshaping gently while damp. Do not wring or tumble dry to preserve the cable stitch structure.
FAQ
Can I use a larger hook if my hands are bigger?
Yes! If you need a larger size, bumping your hook up to a 5.0 mm (H) will increase the overall gauge and create a roomier fit.
Are these mittens suitable for total beginners?
While the cable stitch requires a bit of focus, the pattern uses basic half double crochet stitches for the main body, making it a wonderful intermediate project for practicing post stitches.
Can I make them without the cable?
Certainly. You can substitute the cable stitches with standard half double crochet stitches for a completely smooth, textured-free plain fingerless mitt.
Happy Crocheting!
I hope you love making and wearing your new cable crochet fingerless mittens. Save this pin on Pinterest to keep the free pattern handy, and be sure to leave a comment below sharing what color yarn you chose for your project!
📄 Your free PDF pattern
⏳ Preparing your free PDF… 30s
Like this one? Save it for later.