Plump Turkey Gnome Crochet Shelf Sitter Free Thanksgiving Pattern
Reader Favorites










Knit Look Crochet Balaclava Hood Free Winter Pattern

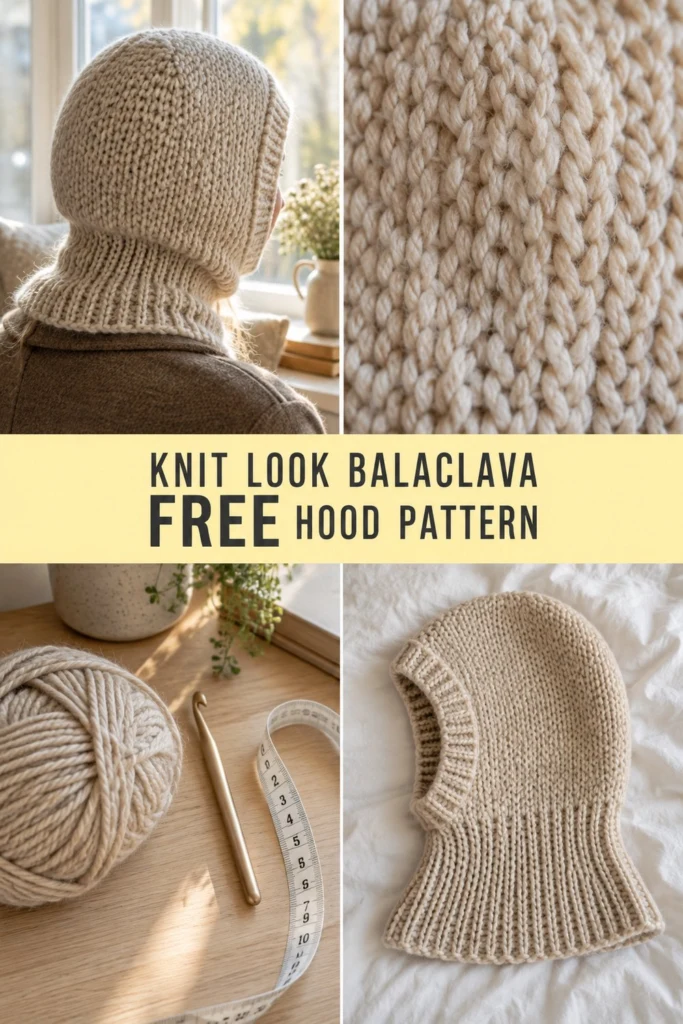
Stay cozy and stylish through the cold weather with this modern knit-look crochet balaclava. Designed to combine the polished aesthetic of classic stockinette knitting with the speed and structure of crochet, this winter hood features smooth vertical V-stitches throughout the crown, a fitted face opening with ribbed trim, and a deep turtleneck cowl that tucks seamlessly into your coat.
Knit Look Crochet Balaclava Hood Free Winter Pattern
Quick Facts
- Skill level: Intermediate
- Finished size: Adult Small (Medium, Large) to fit head circumferences 20–21 (22–23, 24–25) in / 51–53.5 (56–58.5, 61–63.5) cm
- Yarn: Bulky weight (Category 5) in Oatmeal Beige
- Hook: 7.0 mm (US K-10.5) for hood body and 6.0 mm (US J-10) for ribbed trims
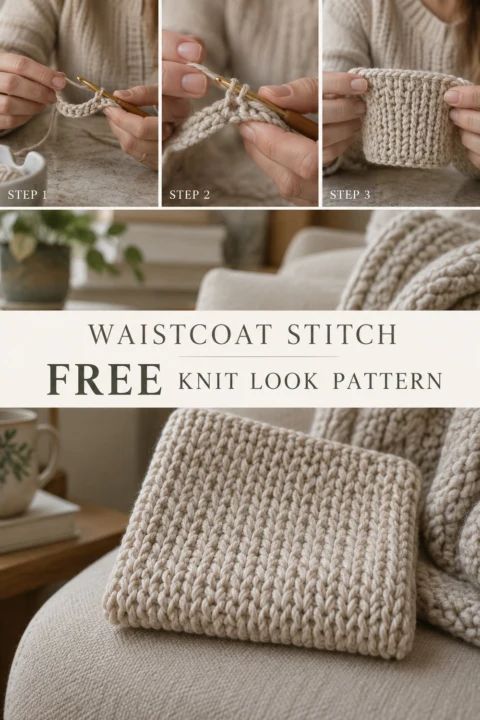
- Stitches used: Chain (ch), single crochet (sc), back loop only single crochet (BLO sc), center single crochet / waistcoat stitch (csc), slip stitch (sl st)
- Time to make: 4 to 6 hours
💡 Designer Tip: Detailed size customization instructions are provided later in this article to help you achieve a custom fit for any head size.
What Makes This Knit Look Balaclava Special
This balaclava hood replicates the smooth, classic texture of hand-knitted stockinette while retaining the warmth and density of crochet:
- Waistcoat Stitch Crown: Working single crochet stitches directly between the legs of the V from the previous row creates seamless vertical columns that look identical to knitted stockinette stitch.
- Deep Turtleneck Collar: The lower ribbing is worked sideways using back-loop-only stitches, giving high elasticity so it stretches easily over the head while hugging the neck securely against cold winter drafts.
- Fitted Face Opening: A perpendicular ribbed border frames the face comfortably, preventing gaping while creating a clean, high-end finished edge.
Skill Level
This project is rated Intermediate.
- Working in back loops only (BLO)
- Working center single crochet (waistcoat stitch) into the V-posts
- Working ribbing attached directly to raw crochet edges
- Seaming a top crown edge flat
If you know how to single crochet and chain, learning the waistcoat stitch is simple and very rewarding!
Finished Measurements
| Measurement | Adult Small (S) | Adult Medium (M) | Adult Large (L) |
|---|---|---|---|
| To Fit Head Circumference | 20–21 in / 51–53.5 cm | 22–23 in / 56–58.5 cm | 24–25 in / 61–63.5 cm |
| Hood Circumference (Main Body) | 19 in / 48.5 cm | 21 in / 53.5 cm | 23 in / 58.5 cm |
| Total Height (Neck to Crown) | 14 in / 35.5 cm | 15 in / 38 cm | 16 in / 40.5 cm |
| Neck Collar Depth | 5.5 in / 14 cm | 6 in / 15 cm | 6 in / 15 cm |
| Face Opening Height | 7.5 in / 19 cm | 8 in / 20.5 cm | 8.5 in / 21.5 cm |
Note: This garment is designed with approximately 1 to 2 inches (2.5 to 5 cm) of negative ease so it stays snug and warm.
Materials You Will Need
| Item | Color | Details / Quantity |
|---|---|---|
| Main Yarn | Oatmeal Beige | Bulky weight (Category 5); S: 320 yds (293 m) / M: 370 yds (338 m) / L: 420 yds (384 m) |
| Crochet Hooks | N/A | 7.0 mm (US K-10.5) for main hood; 6.0 mm (US J-10) for ribbing |
| Stitch Markers | N/A | 4 locking stitch markers |
| Tapestry Needle | N/A | Yarn needle with large eye for weaving ends and seaming |
| Measuring Tape | N/A | Standard flexible tape measure |
| Scissors | N/A | Sharp yarn scissors |
Yarn Suggestions
| Yarn Brand & Line | Weight | Yardage per Skein | Notes |
|---|---|---|---|
| Lion Brand Hue & Me | Bulky #5 | 137 yds (125 m) / 125 g | 80% Acrylic, 20% Wool; excellent stitch clarity and matte finish. |
| Paintbox Yarns Simply Chunky | Bulky #5 | 149 yds (136 m) / 100 g | 100% Acrylic; very soft texture with crisp V-stitch definition. |
| Knit Picks Simply Wool Bulky | Bulky #5 | 193 yds (176 m) / 100 g | 100% Eco-Wool; warm, breathable, and authentic natural wool feel. |
⚠️ Note: Avoid novelty, textured, or fuzzy novelty yarns (such as bouclé or faux fur). The waistcoat stitch relies on seeing the center legs of each single crochet stitch clearly; textured yarns make finding stitch posts very difficult.
Gauge
- Waistcoat Stitch (csc): 11 sts and 14 rnds = 4 in (10 cm) using 7.0 mm hook.
- Neck Ribbing (BLO sc): 14 sts and 14 rows = 4 in (10 cm) using 6.0 mm hook.
💡 Designer Tip: If your waistcoat stitch gauge is too tight, switch to a hook 0.5 mm or 1.0 mm larger. Waistcoat stitch tends to draw in tight if you do not pull your loop up to the height of the current row.
Abbreviations
| Abbreviation | Full Name |
|---|---|
| ch | chain |
| csc | center single crochet (waistcoat stitch) |
| BLO | back loop only |
| ea | each |
| inc | increase (2 sts in same st) |
| rem | remaining |
| rep | repeat |
| rnd(s) | round(s) |
| rs | right side |
| sc | single crochet |
| sl st | slip stitch |
| st(s) | stitch(es) |
| ws | wrong side |
UK Conversion: sc = dc (double crochet); sl st = sl st.
Special Stitches Explained
1. Center Single Crochet (csc / Waistcoat Stitch)
Insert hook between the two vertical legs (in the center of the “V”) of the single crochet stitch from the row below, rather than under the top two loops. Yarn over, pull up a loop to the full height of the current row, yarn over, and draw through both loops on hook.
2. Back Loop Only Single Crochet (BLO sc)
Insert hook into only the back strand (loop farthest away from you) of the top V of the stitch. Yarn over, pull up a loop, yarn over, and pull through both loops.
Pattern Instructions
Section 1: Neck Ribbing Collar (Oatmeal Beige, make 1)
Worked sideways in turned rows using the 6.0 mm hook.
Ch 21 (21, 21).
- Row 1: Sc in 2nd ch from hook and in each ch across, turn. (20 sc)
- Row 2: Ch 1 (does not count as st here and throughout), BLO sc in each of the 20 sts across, turn. (20 BLO sc)
- Rows 3 to 56 (62, 68): Repeat Row 2. (20 BLO sc)
Fold the ribbing strip in half so Row 1 and Row 56 (62, 68) meet.
– Join Row: Ch 1, sl st through the foundation chain loops and the back loops of the last row across all 20 sts to form a tube. Do not cut yarn. (20 sl st)
✅ Checkpoint: Your ribbed collar tube should measure approximately 16 (17.5, 19.5) in / 40.5 (44.5, 49.5) cm in circumference un-stretched and 5.5 (6, 6) in / 14 (15, 15) cm deep.
Section 2: Lower Hood Transition (Oatmeal Beige)
Switch to 7.0 mm hook. Now working around the top edge of the ribbed neck tube.
- Rnd 1: Ch 1, turn work 90 degrees to work into the row-ends of the neck ribbing. Work 1 sc into each row-end around the collar edge. Join with sl st to first sc. (56 (62, 68) sc)
- Rnd 2: Ch 1, csc in each st around. Join with sl st to first csc. (56 (62, 68) csc)
- Rnds 3 to 6: Repeat Rnd 2. (56 (62, 68) csc)
Section 3: Upper Hood Body (Oatmeal Beige)
Now splitting for the face opening and working back and forth in turned rows using 7.0 mm hook.
- Row 1 (RS): Ch 1, csc in the first 44 (48, 52) sts across. Leave the remaining 12 (14, 16) sts unworked at the front for the face opening split. Turn. (44 (48, 52) csc)
- Row 2 (WS): Ch 1, csc in each of the 44 (48, 52) sts across, turn. (44 (48, 52) csc)
- Rows 3 to 28 (30, 32): Repeat Row 2. (44 (48, 52) csc)
✅ Checkpoint: From the face split edge to the top edge, your work should measure approximately 7.5 (8, 8.5) in / 19 (20.5, 21.5) cm.
Section 4: Crown Seam & Shaping (Oatmeal Beige)
- Turn the hood inside out so the wrong side (WS) is facing outward.
- Fold the top opening flat, aligning the 44 (48, 52) stitches into 22 (24, 26) pairs from back to front.
- Seaming: Using the 7.0 mm hook, ch 1, sl st through both inner loops of each matching pair of stitches across top edge. (22 (24, 26) sl st)
- Fasten off and weave in end inside the hood. Turn the hood right side out.
Section 5: Face Ribbing Trim (Oatmeal Beige)
Switch to 6.0 mm hook. Reattach yarn at the bottom right corner of the face opening.
- Setup Rnd: Ch 1, work sc evenly around the face opening edge as follows: 12 (14, 16) sc along bottom unworked sts, 28 (30, 32) sc up left side row-ends, and 28 (30, 32) sc down right side row-ends. Join with sl st to first sc. (68 (74, 80) sc)
Do not cut yarn. Now work the perpendicular ribbing:
Ch 7.
– Row 1: Sc in 2nd ch from hook and in next 5 ch, sl st into next 2 sc of Setup Rnd, turn. (6 sc, 2 sl st)
– Row 2: Skip the 2 sl sts, BLO sc in the 6 sc, turn. (6 sc)
– Row 3: Ch 1, BLO sc in 6 sc, sl st into next 2 sc of Setup Rnd, turn. (6 sc, 2 sl st)
– Rows 4 to 68 (74, 80): Repeat Rows 2–3 around the entire face opening until all 68 (74, 80) sts of Setup Rnd have been attached.
- Join Ribbing: Sl st the last row to the foundation chain of the face ribbing across all 6 sts to close the ribbing loop.
Fasten off yarn.
✅ Checkpoint: The ribbed trim should frame the face opening neatly without pulling or puckering the main hood.
Assembly & Finishing
- Top Crown Corners: If desired, use a tapestry needle and yarn to gently cinch the top left and right rear corners inward from the inside of the hood for a smoother, rounded silhouette.
- Weaving Ends: Using a tapestry needle, weave in all loose yarn ends securely along the interior seams.
- Light Steam Blocking: Hold a steam iron 2 inches away from the hood (do not touch yarn directly) and gently shape the crown and face trim for an ultra-smooth finish.
Size Customization Tips
- Custom Neck Depth: Add or subtract initial foundation chains on the neck ribbing (e.g., Ch 25 for a longer 7 in / 18 cm cowl collar).
- Custom Hood Height: Add 2 rows to Section 3 (Upper Hood) to add approximately 0.5 in (1.3 cm) of extra vertical crown clearance.
- Face Opening Adjustment: For a wider face opening, unwork 2 additional stitches during Section 3 (Row 1 face split), and add 4 total stitches to the face trim setup round.
Care Instructions
- Hand Wash Cold: Gently soak in cold water with wool detergent.
- Do Not Wring: Gently press out excess moisture between towel folds.
- Lay Flat to Dry: Reshape the hood flat on a dry towel away from direct heat or sunlight.
FAQ
Can I make this pattern using Worsted Weight yarn?
Yes! If using worsted weight (Category 4) yarn, use a 5.5 mm hook for the body and a 4.5 mm hook for ribbing. Add 6 rows to the neck ribbing and 4 rows to the main hood body to achieve the correct finished dimensions.
How do I prevent my waistcoat stitch from being too tight?
When pulling up the loop in center single crochet (csc), pull the loop up generously so it reaches the height of the working row before finishing the stitch. Using a hook size larger for the body than for the ribbing also keeps the fabric supple.
Can I add a pompom or drawstring?
Absolutely! A faux-fur or yarn pompom can be sewn directly to the top crown seam. For a drawstring, chain a 36-inch cord and weave it through the channels of the face opening ribbing.
Happy Crocheting!
You have completed your knit-look crochet balaclava hood! Save this project on Pinterest and share your finished hood creations.
📄 Your free PDF pattern
⏳ Preparing your free PDF… 30s
Like this one? Save it for later.