Plump Turkey Gnome Crochet Shelf Sitter Free Thanksgiving Pattern
Reader Favorites










Puff Sleeve Crochet Sweater Free Crochet Pattern

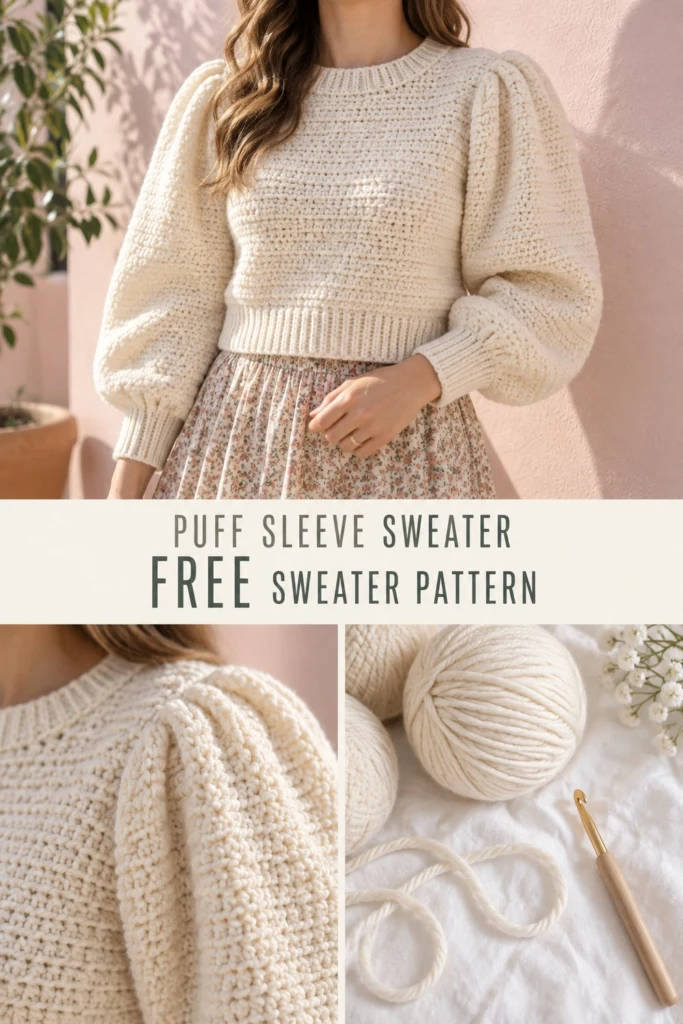
When crisp autumn air turns to winter chill, nothing beats slipping into a handmade garment that feels equal parts cozy and romantic. This cropped sweater pairs a clean, straightforward body with dramatic, cloud-like puff sleeves gathered gently into ribbed cuffs. Designed for makers who want a sweater that looks straight out of a boutique, this project combines simple half double crochet panels with statement shoulders you will love wearing all season long.
Puff Sleeve Crochet Sweater Free Crochet Pattern
Quick Facts
- Skill level: Intermediate
- Finished size: Women’s XS (S, M, L, XL, 2XL)
- Yarn: Worsted weight wool or acrylic blend in Cream
- Hook: US J/10 (6.0 mm) crochet hook and US I/9 (5.5 mm) crochet hook for ribbing
- Stitches used: Ch, sl st, sc, hdc, hdc2tog, blo
- Time to make: 25 to 30 hours
Size tips, adjustments, and gauge checkpoints are included further down so you can customize the fit perfectly.
What Makes This Crochet Sweater Special
The magic of this piece lies in the contrast between the fitted, textured ribbed hem and the voluminous puff sleeves. The body is worked flat in simple half double crochet panels, keeping the construction accessible, while the sleeves use strategic increases to create that striking shoulder drape before tapering neatly into structured ribbed cuffs.
Skill Level
- Working flat in rows and in the round for cuffs and collar
- Counting stitches and managing multi-size stitch counts
- Basic garment seaming and picking up stitches
- Following gauge to ensure correct measurements
You can easily tackle this project if you are comfortable reading a garment pattern and keeping track of stitch placement.
Finished Measurements
| Size | Bust/Chest (in / cm) | Length (in / cm) | Sleeve Length (in / cm) | Ease (in / cm) |
|---|---|---|---|---|
| XS | 32–34 / 81–86 | 18 / 46 | 24 / 61 | 2 / 5 |
| S | 36–38 / 91–97 | 18.5 / 47 | 24 / 61 | 2 / 5 |
| M | 40–42 / 102–107 | 19 / 48 | 24.5 / 62 | 2 / 5 |
| L | 44–46 / 112–117 | 19.5 / 50 | 25 / 64 | 2 / 5 |
| XL | 48–50 / 122–127 | 20 / 51 | 25 / 64 | 2 / 5 |
| 2XL | 52–54 / 132–137 | 20.5 / 52 | 25.5 / 65 | 2 / 5 |
Materials You Will Need
| Material | Details | Quantity |
|---|---|---|
| Cream Yarn | Worsted weight (Category 4), approx. 180 yds / 165 m per 100g skein | 5 (6, 6, 7, 8, 9) skeins |
| Crochet Hook | US J/10 (6.0 mm) | 1 |
| Crochet Hook | US I/9 (5.5 mm) for ribbing | 1 |
| Notions | Tapestry needle, locking stitch markers, measuring tape | Set |
Yarn Suggestions
| Yarn Line | Weight | Skein Yardage | Notes |
|---|---|---|---|
| Lion Brand Wool-Ease | Aran / Worsted | 197 yds / 180 m | Excellent stitch definition and soft wool-acrylic blend. |
| Caron Simply Soft | Worsted | 315 yds / 288 m | Beautiful sheen and lovely drape for garment making. |
| Knit Picks Brava Worsted | Worsted | 218 yds / 199 m | Durable, washable, and budget-friendly acrylic. |
⚠️ Note: Avoid novelty, eyelash, or heavily textured fuzzy yarns for this pattern, as they will obscure the half double crochet texture and hide the clean lines of the puff sleeve shaping.
Gauge
- 13 hdc x 10 rows = 4 in / 10 cm using 6.0 mm hook.
- Ribbing: 8 sts x 8 rows = 2 in / 5 cm using 5.5 mm hook in BLO.
Abbreviations
- ch: chain
- sl st: slip stitch
- sc: single crochet
- hdc: half double crochet
- hdc2tog: half double crochet 2 stitches together (decrease)
- blo: back loop only
- st(s): stitch(es)
- rep: repeat
- rnd(s): round(s)
- RS: right side
- WS: wrong side
UK: sc = dc, hdc = htr, dc = tr.
Special Stitches Explained
- Half Double Crochet 2 Together (hdc2tog): Yarn over, insert hook into next st, yarn over and pull up a loop (3 loops on hook). Yarn over, insert hook into following st, yarn over and pull up a loop (5 loops on hook). Yarn over and pull through all 5 loops on hook.
- Back Loop Only Ribbing (BLO): Working exclusively in the rear loop of each stitch from the previous row to create a stretchy, ribbed fabric.
Pattern Instructions
Pattern Notes
- The turning chain 2 at the beginning of hdc rows does NOT count as a stitch unless specifically stated.
- Use stitch markers to keep track of shoulder seams and sleeve gathering points.
- Instructions are written for size XS with sizes S, M, L, XL, and 2XL given in parentheses.
Section 1: Bottom Ribbing (Worked Flat)
Using US I/9 (5.5 mm) hook and Cream:
Row 1: Ch 11, working in back bumps of foundation chain, sc in 2nd ch from hook and in each ch across, turn. (10 sc)
Row 2: Ch 1, working in BLO, sc in each st across, turn. (10 sc)
Rows 3 to 64 (70, 76, 84, 90, 96): Rep Row 2. Do not fasten off. Rotate work to work along the long edge of the ribbing band for the body panel.
Section 2: Front Body Panel
Switch to US J/10 (6.0 mm) hook and Cream.
Row 1 (RS): Ch 2 (does not count as st here and throughout), work 64 (70, 76, 84, 90, 96) hdc evenly across the top edge of the ribbing band, turn. (64, 70, 76, 84, 90, 96 hdc)
Rows 2 to 24: Ch 2, hdc in each st across, turn. (64, 70, 76, 84, 90, 96 hdc)
Shape Neck and Shoulders:
Row 25: Work first 18 (20, 22, 24, 26, 28) hdc, turn, leaving remaining sts unworked. (18, 20, 22, 24, 26, 28 hdc)
Row 26: Ch 2, hdc2tog, hdc across to edge, turn. (17, 19, 21, 23, 25, 27 hdc)
Row 27: Ch 2, hdc across to last 2 sts, hdc2tog, fasten off leaving a 12 in / 30 cm tail. (16, 18, 20, 22, 24, 26 hdc)
Skip center 28 (30, 32, 36, 38, 40) sts for neckline. Attach yarn to remaining unworked sts on opposite shoulder, rep Rows 25 to 27 symmetrically.
Section 3: Back Body Panel
Work identical to Front Body Panel through Row 24 without neck shaping.
Rows 25 to 27: Ch 2, hdc in each st across, turn. (64, 70, 76, 84, 90, 96 hdc)
Fasten off leaving a 12 in / 30 cm tail.
✅ Checkpoint: Front and Back panels should measure approximately 18 (18.5, 19, 19.5, 20, 20.5) inches in total length including the ribbing band.
Section 4: Puff Sleeves (Make 2)
Using US I/9 (5.5 mm) hook and Cream:
Row 1: Ch 17, sc in 2nd ch from hook and across, turn. (16 sc)
Rows 2 to 22 (24, 24, 26, 26, 28): Ch 1, working in BLO, sc in each st across, turn. (16 sc)
Join short ends of cuff with a sl st seam, turning cuff right side out. Switch to US J/10 (6.0 mm) hook.
Rnd 1 (RS): Ch 2, work 36 (38, 40, 42, 44, 46) hdc evenly around the outer edge of the cuff, join with sl st to first hdc. (36, 38, 40, 42, 44, 46 hdc)
Rnd 2: Ch 2, (2 hdc in next st, hdc in next 2 sts) around, join with sl st. (48, 50, 53, 56, 58, 61 hdc)
Rnds 3 to 8: Ch 2, hdc in each st around, join with sl st. (48, 50, 53, 56, 58, 61 hdc)
Rnd 9: Ch 2, (2 hdc in next st, hdc in next 3 sts) around, join with sl st. (60, 62, 66, 70, 72, 75 hdc)
Rnds 10 to 22: Ch 2, hdc in each st around, join with sl st. (60, 62, 66, 70, 72, 75 hdc)
Fasten off leaving a long tail of 18 in / 45 cm for gathering and assembly.
Section 5: Collar Band
With front and back shoulders seamed together using mattress stitch:
Rnd 1: Join Cream yarn at shoulder seam using US I/9 (5.5 mm) hook, ch 1, work sc evenly around entire neckline opening (approx. 64 to 72 sc), join with sl st.
Rnds 2 to 4: Ch 1, working in BLO, sc in each st around, join with sl st. Fasten off and weave in ends.
Assembly
- Shoulder Seams: Lay front and back panels RS facing together. Seam shoulder edges using matching yarn tails.
- Sleeve Attachment: Gather the top edge of each puff sleeve down to fit the armhole opening (approx. 7 to 8 inches across). Pin securely, centering the sleeve peak over the shoulder seam. Sew in place using whipstitch.
- Side Seams: Fold sweater at shoulders, pin front to back along side edges and inner sleeves, then seam from cuff up to underarm and down to bottom ribbing.
Finishing
Weave in all remaining ends securely on the WS. Block sweater gently by pinning to measurements on a blocking mat and steaming lightly with an iron, avoiding direct contact with the acrylic/wool blend yarn.
Size Customization Tips
- Adjusting Length: Add or subtract rows in Section 2 (Body Panel) before starting neck shaping. Each extra hdc row adds about 0.4 inches / 1 cm in length.
- Sleeve Volume: To make the puff sleeves even more dramatic, add an extra increase round in Section 4 before working the straight upper sleeve rounds.
Care Instructions
- Hand wash cold with mild wool detergent.
- Do not bleach or tumble dry.
- Dry flat in shade on a towel, reshaping while damp.
- Store folded; do not hang by the shoulders to avoid stretching.
FAQ
Can I use cotton yarn instead of wool or acrylic?
You can use a worsted-weight cotton yarn, but keep in mind that cotton has more weight and less natural bounce. The puff sleeves may drape differently and feel slightly heavier than the version shown in the photo.
How do I make the sweater larger or smaller?
To adjust the size beyond the written instructions, add or subtract stitches in multiples of 2 for the foundation ribbing band, ensuring your stitch count matches your desired bust measurement plus ease.
Is this pattern beginner-friendly?
While the body panels are very beginner-friendly, shaping the neckline and gathering the voluminous puff sleeves make this pattern best suited for confident makers who have mastered basic shaping and garment assembly.
Happy Crocheting!
I cannot wait to see your gorgeous puff sleeve sweaters come to life. Save this pattern and pin it to your favorite crochet boards on Pinterest, and leave a comment below sharing what color you plan to make yours in!
📄 Your free PDF pattern
⏳ Preparing your free PDF… 30s
Like this one? Save it for later.