Plump Turkey Gnome Crochet Shelf Sitter Free Thanksgiving Pattern
Reader Favorites











Tiny Stocking Crochet Gift Card Holder Free Christmas Pattern

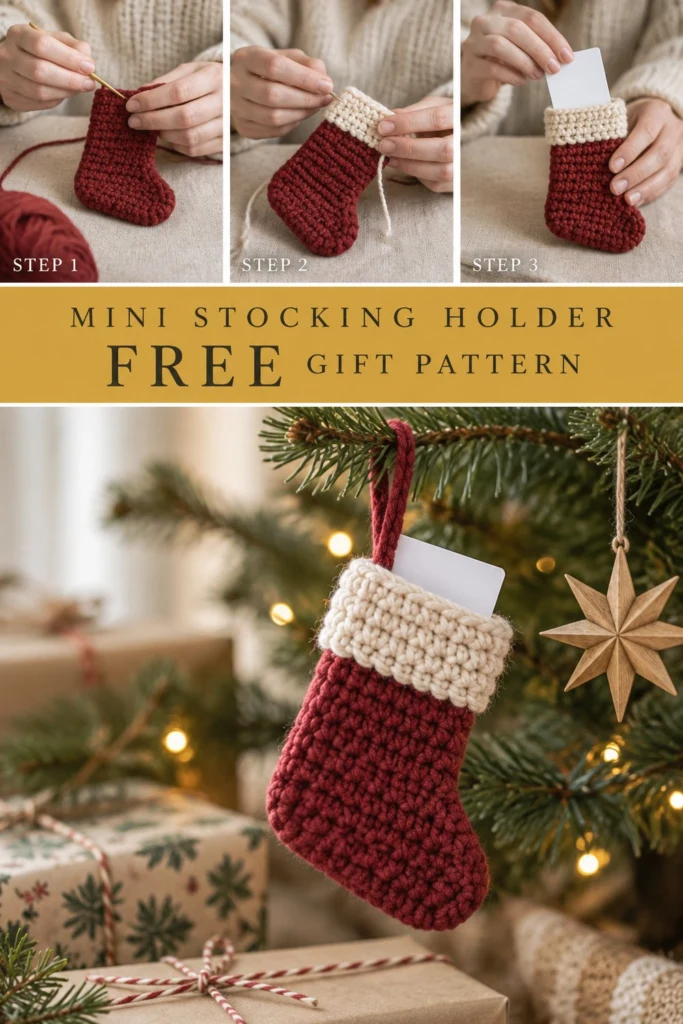
A gift card feels far less last minute when it arrives inside a tiny handmade stocking. The shape is flat single crochet folded and seamed, the cream cuff adds the look of a proper stocking, and the pocket is sized to fit a standard card with room to spare. Tuck it in a pile of presents or hang it on the tree with this free crochet pattern and easy crochet Christmas gift, finished in well under an hour.
Tiny Stocking Crochet Gift Card Holder Free Christmas Pattern
Quick Facts
- Skill level: Easy Beginner
- Finished size: 5 inches (12.7 cm) tall by 3 inches (7.6 cm) wide at the foot
- Yarn: Worsted weight (Category 4) 100% cotton yarn in Burgundy and Cream
- Hook: US G/6 (4.0 mm) crochet hook
- Stitches used: ch, sl st, sc, inc, dec
- Time to make: 45 minutes
Size tips and customization options are included further down the page.
What Makes This Mini Crochet Stocking Special
This design relies on a clever flat-seaming technique where two identical foot panels are worked separately in simple single crochet rows and then slip-stitched together along the edges. The contrasting cream cuff is worked directly onto the top edge in the round, creating a neat, sturdy pocket that securely holds a gift card without stretching out of shape. A simple matching hanging loop is attached to the inner heel corner, making it ready to hang on a Christmas tree branch.
Skill Level
- Basic understanding of how to hold a hook and yarn
- Making a slip knot and working a chain
- Single crochet stitches (sc)
- Working basic increases (inc) and decreases (dec)
- Working flat in rows and joining in the round
Don’t worry if you are new to shaping; the detailed row-by-row instructions walk you through every step of the heel and toe curves!
Finished Measurements
- Height: 5 inches (12.7 cm) from the top of the cuff to the bottom of the heel
- Foot length: 4 inches (10.2 cm) from the back of the heel to the front of the toe
- Width: 3 inches (7.6 cm) across the ankle opening
Materials You Will Need
| Material | Color Name | Yarn Weight / Type | Yardage / Amount |
|---|---|---|---|
| Main Yarn | Burgundy | Worsted Weight (4) Cotton | 35 yards (32 meters) |
| Contrast Yarn | Cream | Worsted Weight (4) Cotton | 15 yards (14 meters) |
| Hook | — | US G/6 (4.0 mm) crochet hook | — |
| Notions | — | Yarn needle, locking stitch markers, scissors | — |
Yarn Suggestions
| Yarn Line | Weight | Notes |
|---|---|---|
| Lily Sugar’n Cream | Worsted (4) | 100% Cotton, great stitch definition and vibrant holiday colors |
| Lion Brand 24/7 Cotton | Worsted (4) | Mercerized cotton with a lovely slight sheen |
| Drops Paris | Worsted (4) | Soft, matte cotton that holds its shape wonderfully for small holders |
⚠️ Note: Avoid stretchy acrylic yarns for this project, as cotton provides the stiffness needed to keep the gift card securely in place without sagging.
Gauge
- 16 sc and 18 rows = 4 inches (10 cm) in single crochet using a US G/6 (4.0 mm) hook.
- Exact gauge is not critical for this gift card holder, but maintaining an even tension ensures the pocket remains snug.
Abbreviations
- ch: chain
- sl st: slip stitch
- sc: single crochet
- inc: single crochet increase (work 2 sc in the same stitch)
- dec: single crochet invisible decrease (work next 2 sts together through front loops)
- st(s): stitch(es)
- rep: repeat
- RS: right side
- WS: wrong side
UK terms conversion: sc = dc, sl st = sl st.
Special Stitches Explained
There are no complex or unusual stitches required for this pattern. All shaping is done using standard single crochet increases and decreases.
Pattern Instructions
Pattern Notes
- The stocking is made by crocheting two identical flat side panels in Burgundy, seaming them together around the foot and heel, and then working the Cream cuff in the round from the top opening.
- Turning chains do not count as stitches throughout. Always work your first stitch of the row into the very first stitch unless otherwise instructed.
Section 1: Stocking Panels (Burgundy, make 2)
Row 1: With Burgundy, ch 15, working in the back bumps of the foundation chain, 1 sc in 2nd ch from hook, 1 sc in each ch across, turn. (14 sc)
Row 2: Ch 1, 1 inc in first st, sc in next 12 sts, 1 inc in last st, turn. (16 sc)
Rows 3 to 5: Ch 1, sc in each st across, turn. (16 sc)
Row 6: Ch 1, dec, sc in next 12 sts, dec, turn. (14 sc)
Rows 7 to 9: Ch 1, sc in each st across, turn. (14 sc)
Row 10: Ch 1, dec, sc in next 10 sts, dec, turn. (12 sc)
Rows 11 to 12: Ch 1, sc in each st across, turn. (12 sc)
Row 13: Ch 1, sc in first 4 sts, turn, leaving remaining 8 sts unworked. (4 sc)
Rows 14 to 15: Ch 1, sc in each st across, turn. (4 sc)
Fasten off Burgundy, leaving a 12-inch (30 cm) tail on one of the panels for seaming.
Section 2: Cuff and Hanging Loop (Cream)
Place the two stocking panels together with wrong sides facing inward and matching all outer edges. Join Cream yarn at the top back corner opening to work in the round around the top edge.
Rnd 1: Ch 1, work 22 sc evenly spaced around the top opening of the stocking, join with sl st to first sc. (22 sc)
Rnds 2 to 5: Ch 1, sc in each st around, join with sl st to first sc. (22 sc)
Hanging Loop: Without cutting the yarn at the end of Rnd 5, ch 12, sl st into the base of the chain just worked to form a loop, secure with a sl st to the adjacent inner stitch. Fasten off and weave in all loose ends.
Section 3: Assembly and Seaming
- Using the 12-inch tail left on Panel 1 and a yarn needle, whipstitch the two Burgundy side panels together around the outer edges of the foot, toe, sole, and heel.
- Leave the top Cream cuff opening unseamed so the pocket remains open.
- Secure your yarn tightly and weave any remaining tails inside the layers of the stocking.
✅ Checkpoint: At this point, your mini stocking should measure roughly 5 inches tall, with a stiff, neat Cream cuff at the top and a closed Burgundy foot at the bottom. Slide in a standard gift card to test the fit!
Size Customization Tips
- To make a slightly taller stocking for cash bills or larger notes, add 2 to 4 extra straight rows of single crochet to the top of the Burgundy panel before starting the Cream cuff.
- Changing your hook size up or down by one letter size will easily adjust the overall scale if you want an oversized ornament version.
Care Instructions
- Hand wash gently in cool water with mild wool wash.
- Lay flat to dry on a clean towel, shaping the foot and toe flat so it maintains its crisp gift card pocket shape.
- Do not tumble dry or bleach.
FAQ
Can I use acrylic yarn instead of cotton?
You can use acrylic yarn, but cotton yarn is strongly recommended because it provides natural stiffness. Acrylic tends to stretch out, which can cause the gift card to slip out of the pocket over time.
How do I attach the hanging loop securely?
The loop is chained directly from the top edge of the Cream cuff on the inner back seam. For extra durability when hanging on a tree branch, anchor the base of the chain with an extra couple of whipstitches using matching Cream yarn.
Is this pattern suitable for complete beginners?
Yes! If you know how to make a foundation chain and work basic single crochet stitches with increases and decreases, you can easily complete this project in under an hour.
Happy Crocheting!
I hope you love making these festive gift card holders for your holiday tree and loved ones. When you finish yours, please save the pin on Pinterest and leave a comment below sharing what colors you used for your Christmas setup!
📄 Your free PDF pattern
⏳ Preparing your free PDF… 30s
Like this one? Save it for later.