Plump Turkey Gnome Crochet Shelf Sitter Free Thanksgiving Pattern
Reader Favorites











Striped Candy Cane Crochet Throw Pillow Free Christmas Pattern

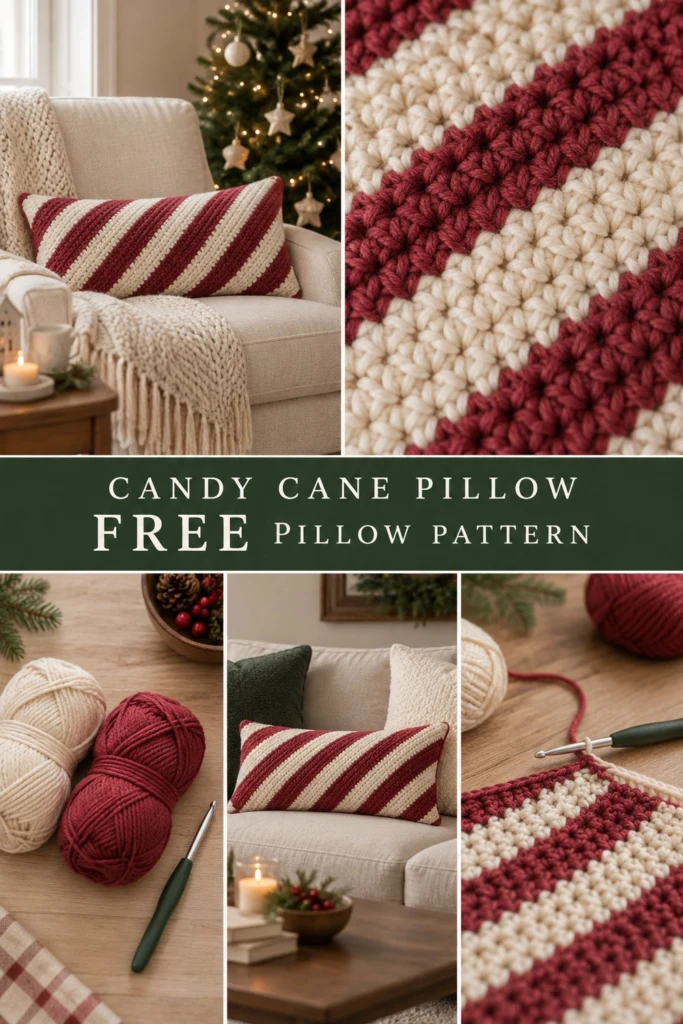
Diagonal stripes in muted cranberry and cream give this long pillow a candy cane feel without shouting about it, sitting happily in your living room all through December. The stripes are worked in simple half double crochet with subtle increases and decreases along the edges, and the back uses a clever envelope opening so you never need zips or buttons.
Striped Candy Cane Crochet Throw Pillow Free Christmas Pattern
Quick Facts
- Skill level: Easy / Intermediate
- Finished size: 24 inches (61 cm) long by 10 inches (25 cm) wide
- Yarn: Worsted weight (Category 4) yarn in Cranberry and Cream
- Hook: US H/8 (5.0 mm) crochet hook
- Stitches used: Ch, sl st, hdc, hdc2tog, hdc-inc
- Time to make: Weekend project (approx. 6 to 8 hours)
Size tips and gauge adjustments are included further down to fit standard bolster inserts.
What Makes This Crochet Lumbar Pillow Special
The charm of this holiday decor piece lies in its diagonal candy cane stripes, achieved by working rows of half double crochet while increasing at the beginning and decreasing at the end of each row (or vice versa). The front panel showcases clean, raised diagonal bands in muted cranberry and creamy white, while the back panel uses a simple two-piece envelope flap in matching stripes so you can easily remove the cover for washing.
Skill Level
- Required skills: Working flat in rows, changing colors at row ends, half double crochet, basic increases (2 hdc in one stitch), basic decreases (hdc2tog).
- Don’t worry if you haven’t worked diagonal rows before; the color changes are straightforward and the envelope back keeps the construction friendly and approachable.
Finished Measurements
| Dimension | Inches | Centimeters |
|---|---|---|
| Length | 24 in | 61 cm |
| Width | 10 in | 25 cm |
| Insert Size | 24 in x 10 in bolster | 61 cm x 25 cm bolster |
Materials You Will Need
| Item | Description | Quantity / Yardage |
|---|---|---|
| Yarn A (Cream) | Worsted Weight (4), 100% Acrylic | Approx. 450 yds / 411 m |
| Yarn B (Cranberry) | Worsted Weight (4), 100% Acrylic | Approx. 350 yds / 320 m |
| Crochet Hook | US H/8 (5.0 mm) | 1 hook |
| Notions | Yarn needle, scissors, stitch markers | 1 set |
| Pillow Insert | 24″ x 10″ rectangular lumbar insert | 1 insert |
Yarn Suggestions
- Caron One Pound (Cream & Cranberry): Excellent stitch definition, durable, and machine washable. (approx. 812 yds per skein for Cream, split as needed).
- Red Heart Super Saver (Soft White & Burgundy): Affordable, widely available, and holds up well for holiday decor. (approx. 364 yds per skein).
⚠️ Note: Avoid novelty, eyelash, or highly textured wool yarns for this project. You want smooth worsted acrylic or cotton blends so the diagonal half double crochet stitches remain crisp and clear.
Gauge
- Gauge: 14 sts x 11 rows = 4 inches (10 cm) in half double crochet using a 5.0 mm hook.
Abbreviations
- ch: chain
- sl st: slip stitch
- hdc: half double crochet
- hdc-inc: half double crochet increase (work 2 hdc in the same stitch)
- hdc2tog: half double crochet 2 together (hdc decrease)
- st(s): stitch(es)
- RS: right side
- WS: wrong side
- rep: repeat
- Alt: alternating
UK conversion note: UK sc = US dc, UK hdc = US htr, UK dc = US tr. This pattern uses standard US terminology.
Special Stitches Explained
- hdc-inc (Half Double Crochet Increase): Yarn over, insert hook into designated stitch, yarn over, pull up a loop (3 loops on hook), yarn over, pull through all 3 loops. Work a second hdc into the exact same stitch.
- hdc2tog (Half Double Crochet Decrease): Yarn over, insert hook into next stitch, yarn over, pull up a loop (3 loops on hook), yarn over, insert hook into following stitch, yarn over, pull up a loop (5 loops on hook), yarn over, pull through all 5 loops.
Pattern Instructions
General Notes
- Turning chains (ch 2) do not count as a stitch throughout.
- Color changes happen at the end of rows as indicated. Carry unused yarn loosely up the side edge when changing colors every 2 rows, or fasten off and weave in ends.
Section 1: Front Panel (Diagonal Striped Rectangle)
Using Yarn A (Cream).
- Row 1 (RS): Ch 74, work 1 hdc in 3rd ch from hook (skipped 2 chs do not count as st), hdc in each ch across (72 hdc). Turn.
- Row 2 (WS): Ch 2, hdc-inc in first st, hdc in each st to last 2 sts, hdc2tog over last 2 sts (72 hdc). Turn.
- Row 3: Change to Yarn B (Cranberry), ch 2, hdc-inc in first st, hdc in each st to last 2 sts, hdc2tog over last 2 sts (72 hdc). Turn.
- Row 4: Ch 2, hdc-inc in first st, hdc in each st to last 2 sts, hdc2tog over last 2 sts (72 hdc). Turn.
- Rows 5 to 28: Continue working 2-row color stripes (2 rows Yarn A, then 2 rows Yarn B), maintaining the hdc-inc at the beginning of every row and hdc2tog at the end of every row. Each row maintains (72 hdc).
- Fasten off after Row 28, weave in all ends.
✅ Checkpoint: Front panel should measure approximately 24 inches wide by 10 inches tall with crisp diagonal stripes running from bottom-left to top-right.
Section 2: Back Panel Flap Top (Envelope Back)
Using Yarn A (Cream).
- Row 1: Ch 74, work 1 hdc in 3rd ch from hook, hdc in each ch across (72 hdc). Turn.
- Row 2: Ch 2, hdc-inc in first st, hdc in each st to last 2 sts, hdc2tog over last 2 sts (72 hdc). Turn.
- Rows 3 to 14: Working in 2-row color stripes matching the front panel (Yarn A for Rows 3-4, Yarn B for Rows 5-6, etc.), continue the increase/decrease edge shaping. Maintain (72 hdc) per row.
- Fasten off and weave in ends.
Section 3: Back Panel Flap Bottom (Envelope Back)
Using Yarn A (Cream).
- Row 1: Ch 74, work 1 hdc in 3rd ch from hook, hdc in each ch across (72 hdc). Turn.
- Row 2: Ch 2, hdc-inc in first st, hdc in each st to last 2 sts, hdc2tog over last 2 sts (72 hdc). Turn.
- Rows 3 to 14: Working in matching 2-row color stripes, continue edge shaping. Maintain (72 hdc) per row.
- Fasten off and weave in ends.
Assembly
- Lay the Front Panel right side up on a flat surface.
- Place the Back Panel Flap Top on top of the front panel, right side down, aligning the top outer edges and overlapping the inner cut edge downwards toward the center.
- Place the Back Panel Flap Bottom on top, right side down, aligning the bottom outer edges and overlapping the inner edge upwards, creating an overlapping envelope slit in the middle third of the pillow.
- Pin all four layers securely around the outer perimeter.
- Join Yarn A at any corner, working through all layers (front panel plus double-layered envelope opening edges), work 1 round of sc evenly spaced around the entire rectangular perimeter, working 3 sc in each corner to keep corners flat. Join with a sl st to first sc.
- Fasten off and weave in all remaining ends.
Finishing
- Insert your 24″ x 10″ rectangular pillow form through the back envelope opening, smoothing the corners into place.
- Give your new christmas pillow crochet pattern project a gentle steam block if needed to settle the half double crochet stitches.
Size Customization Tips
- If your bolster insert is a different length (e.g., 20 inches or 28 inches), simply adjust your starting chain length by multiples of 2, ensuring your foundation chain matches your desired pillow width minus 2 inches for ease.
- Adjust the number of straight stripe rows to match the height of your specific cushion insert.
Care Instructions
Remove pillow insert before washing. Machine wash gentle cycle in cool water with mild detergent. Lay flat to dry out of direct sunlight. Do not bleach or iron.
FAQ
Can I use cotton yarn instead of acrylic?
Yes! Cotton yarn (like Lily Sugar’n Cream) creates wonderful stitch definition for holiday decor, though it will feel slightly heavier and less stretchy than acrylic.
How do I adjust this pattern for a square pillow?
Start with a shorter chain (e.g., 40 stitches) and work fewer stripe rows until your piece forms a square, adjusting the back envelope flaps to match.
Is this pillow safe for homes with small children?
Yes, because this is an all-crochet envelope-back pillow with no buttons, zippers, or hard plastic components, it is entirely soft and safe for family living rooms.
Happy Crocheting!
I hope you enjoyed making this festive lumbar pillow for your holiday home. Be sure to save this free crochet pattern pin on Pinterest, and leave a comment below sharing what colors you used for your candy cane stripes!
📄 Your free PDF pattern
⏳ Preparing your free PDF… 30s
Like this one? Save it for later.