Plump Turkey Gnome Crochet Shelf Sitter Free Thanksgiving Pattern
Reader Favorites











Pocket Size No Sew Crochet Christmas Gnome Free Christmas Pattern

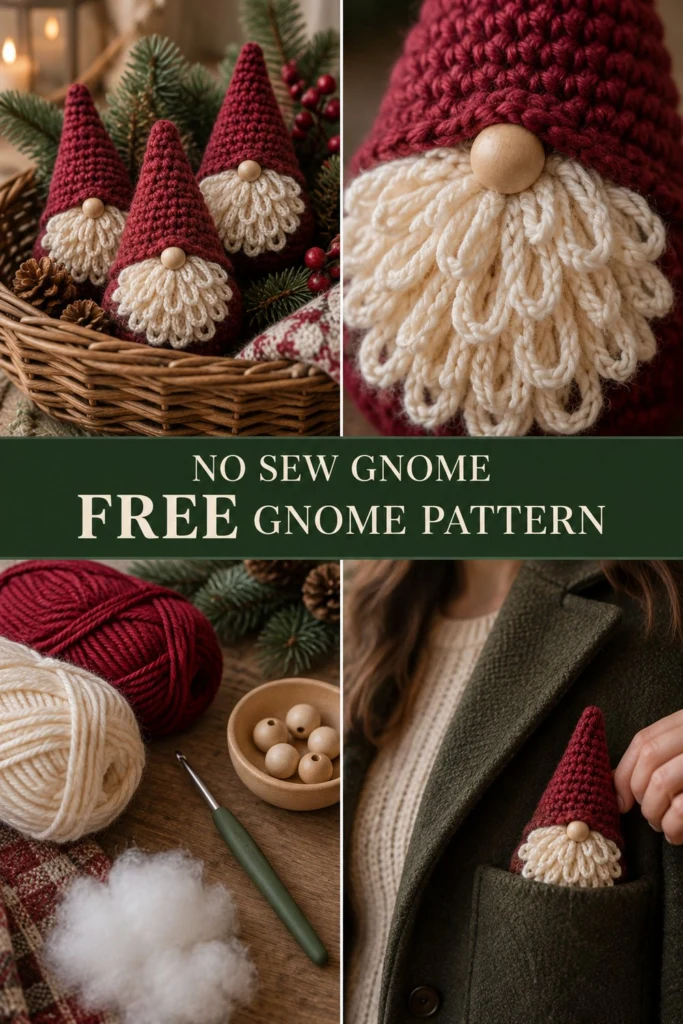
These adorable little gnomes bring so much holiday cheer to your mantel, tree, or pockets, and they are completely no-sew from the start of the hat to the tip of the beard! The continuous single crochet body and clever loopy beard make this a wonderfully quick and satisfying project for the holiday season.
Pocket Size No Sew Crochet Christmas Gnome Free Christmas Pattern
Quick Facts
- Skill level: Easy Beginner
- Finished size: 3.5 inches (9 cm) tall, 2 inches (5 cm) wide at the base
- Yarn: Worsted weight (Medium 4) acrylic yarn in Cranberry Red and Cream
- Hook: US D/3 (3.25 mm) crochet hook
- Stitches used: ch, sl st, sc, inc, dec, FLO, loop stitch (or textured loop technique)
- Time to make: 45 minutes to 1 hour
Size customization tips and gauge details are included further down in this pattern.
What Makes This Pocket Gnome Special
The clever construction of this design means no separate body parts to assemble or join together later! The hat seamlessly transitions into the body in one continuous piece, while the textured beard is worked directly into the front loops of a designated round. A natural wooden bead adds a charming nose without any complicated shaping, and the dense single crochet keeps the polyester stuffing securely hidden inside.
Skill Level
- Working in continuous spiral rounds without joining
- Basic increases and invisible decreases
- Working into front loops only (FLO)
- Working a simple chain loop texture for the beard
Don’t worry if you are new to amigurumi—the step-by-step instructions below will guide you through every single round!
Finished Measurements
| Measurement | Inches | Centimeters |
|---|---|---|
| Height | 3.5 in | 9 cm |
| Base Diameter | 2.0 in | 5 cm |
Materials You Will Need
| Material | Color Name | Yarn Weight | Yardage / Quantity |
|---|---|---|---|
| Yarn A | Cranberry Red | Worsted (4) | 25 yards (23 meters) |
| Yarn B | Cream | Worsted (4) | 10 yards (9 meters) |
- Hook: US D/3 (3.25 mm) crochet hook
- Notions: Polyester fiberfill stuffing, 20 mm round wooden craft bead (with pre-drilled hole), tapestry needle, stitch marker, hot glue gun or strong fabric glue (for securing the nose and beard base if desired)
Yarn Suggestions
| Brand | Line Name | Skein Yardage | Notes |
|---|---|---|---|
| Lion Brand | Basic Stitch Anti Pilling | 185 yds / 170 m | Excellent stitch definition, holds shape well for amigurumi |
| Red Heart | Super Saver | 236 yds / 215 m | Crisp cranberry and cream colors, budget-friendly |
| Knit Picks | Dishie Cotton | 190 yds / 173 m | A wonderful cotton alternative with zero fuzz |
⚠️ Note: Avoid extremely fuzzy novelty yarns or super-bulky yarns for this pocket gnome, as they obscure the stitch definition and make it difficult to maintain the tiny 3.5-inch scale.
Gauge
- Amigurumi Gauge: Rnds 1 to 6 of the hat/body flat circle = 1.5 inches (3.8 cm) across using a 3.25 mm hook.
- Exact gauge is not critical for this project, but work stitches tightly so the polyester stuffing does not show through.
Abbreviations (US Terms)
- ch: chain
- sl st: slip stitch
- sc: single crochet
- inc: single crochet increase (2 sc in the same stitch)
- dec: invisible single crochet decrease (insert hook in front loops of next 2 stitches, yarn over, pull through both, yarn over, pull through remaining 2 loops)
- FLO: front loop only
- st(s): stitch(es)
- Rnd(s): round(s)
- Rep: repeat
- [ ]: work instructions within brackets as many times as directed
UK: sc = dc, hdc = htr, dc = tr.
Special Stitches Explained
- Invisible Decrease (dec): Insert your hook into the front loop only of the next stitch, then immediately insert your hook into the front loop only of the following stitch. Yarn over and pull through both front loops (2 loops on hook). Yarn over and pull through both remaining loops on your hook.
- Beard Loop (ch-loop): To create the loopy beard texture, you will work chain loops directly into the designated stitches of the round. Pull up a loop, ch 5, sl st into the same stitch (or next stitch as indicated).
Pattern Instructions
Pattern Notes:
– The hat and body are worked in one continuous spiral from top to bottom without joining rounds. Use a stitch marker to keep track of the first stitch of each round.
– Stuff the body firmly with polyester fiberfill as you near the final rounds before closing.
Section 1: Hat and Body (Cranberry Red, make 1)
Rnd 1: With Yarn A (Cranberry Red), start with a magic ring and work 6 sc in the ring. (6 sc)
Rnd 2: Sc in each st around. (6 sc)
Rnd 3: [1 sc, inc] x 3. (9 sc)
Rnds 4 to 5: Sc in each st around. (9 sc)
Rnd 4 is a repeat.
Rnd 6: [2 sc, inc] x 3. (12 sc)
Rnds 7 to 8: Sc in each st around. (12 sc)
Rnd 9: [3 sc, inc] x 3. (15 sc)
Rnds 10 to 11: Sc in each st around. (15 sc)
Rnd 12: [4 sc, inc] x 3. (18 sc)
Rnds 13 to 14: Sc in each st around. (18 sc)
Rnd 15: [5 sc, inc] x 3. (21 sc)
Rnds 16 to 17: Sc in each st around. (21 sc)
Rnd 18: [6 sc, inc] x 3. (24 sc)
Rnd 19: Sc in each st around. (24 sc)
✅ Checkpoint: At the end of Rnd 19, your piece should measure about 3 inches from the tip of the hat down, forming a neat pointed cone shape.
Section 2: Beard Base and Transition (Cream and Cranberry Red)
Rnd 20: Working in FLO only, switch to Yarn B (Cream): [Ch 5, sl st in same st] across all 24 sts to form the loopy beard texture. Fasten off Cream.
Rnd 21: Rejoin Yarn A (Cranberry Red) in the unworked back loops of Rnd 19 (behind the beard): work [2 sc, dec] x 6. (18 sc)
Rnd 22: [1 sc, dec] x 6. (12 sc)
Stuff the body firmly with polyester fiberfill now.
Rnd 23: Dec x 6. (6 sc)
Fasten off, leaving a 6-inch tail. Thread tail through the front loops of the remaining 6 stitches and pull tight to close the base flat. Weave in ends.
Section 3: Assembly and Finishing
- Attaching the Nose: Take your 20 mm wooden craft bead and position it directly centered above the top edge of the Cream loopy beard, right at the color change line between the hat and body (around Rnds 17 to 19). Secure the wooden bead firmly using a dab of hot glue or strong fabric glue, holding it in place for 30 seconds until set.
- Beard Arrangement: Fluff out the Cream chain loops with your fingers so they cascade downwards in a full, textured beard shape beneath the wooden nose.
- Embroidery (Optional): If gifting to a child under 3, skip the wooden bead and embroider a small French knot nose using leftover Cream yarn instead of glue or beads.
Size Customization Tips
Want to make a whole family of gnomes for a holiday market basket? You can easily adjust the size by changing your yarn weight and hook! Using bulky blanket yarn with a US J/10 (6.0 mm) hook creates a chunky 7-inch doorstop gnome, while fingering weight yarn and a US B/1 (2.25 mm) hook yields a tiny 2-inch ornament gnome. Each extra increase round added to the hat adds about 0.5 inches to the base diameter.
Care Instructions
Spot clean gently with a damp cloth and mild soap. Do not submerge in water if using a glued wooden bead or cardboard base inserts. Air dry completely away from direct heat.
FAQ
Can I use scrap yarn for these gnomes?
Yes! These pocket gnomes are the ultimate stash-buster project. Any weight of yarn will work as long as you pair it with a hook size slightly smaller than recommended on the yarn label to keep your stitches tight.
How do I make the gnome stand up straight?
The flat base created by Rnd 23 and closing the bottom tight allows the gnome to sit upright on its own. If you want extra stability for a mantel display, you can drop a few poly pellets or clean glass beads into the bottom before adding the polyester fiberfill stuffing.
Are these safe for young children?
When made with a glued wooden bead nose, these gnomes are recommended for decorative holiday display or children over age 3. For babies and toddlers, simply embroider the nose with yarn stitches instead of using a wooden bead.
Happy Crocheting!
I hope you love making these charming no-sew holiday gnomes as much as I do! They stitch up so fast you’ll want a whole forest of them. Please save this pattern to your Pinterest holiday board and leave a comment below to let me know what colors you chose for your festive crew!
📄 Your free PDF pattern
⏳ Preparing your free PDF… 30s
Like this one? Save it for later.