Plump Turkey Gnome Crochet Shelf Sitter Free Thanksgiving Pattern
Reader Favorites











Little Polar Bear Crochet Amigurumi Free Christmas Pattern

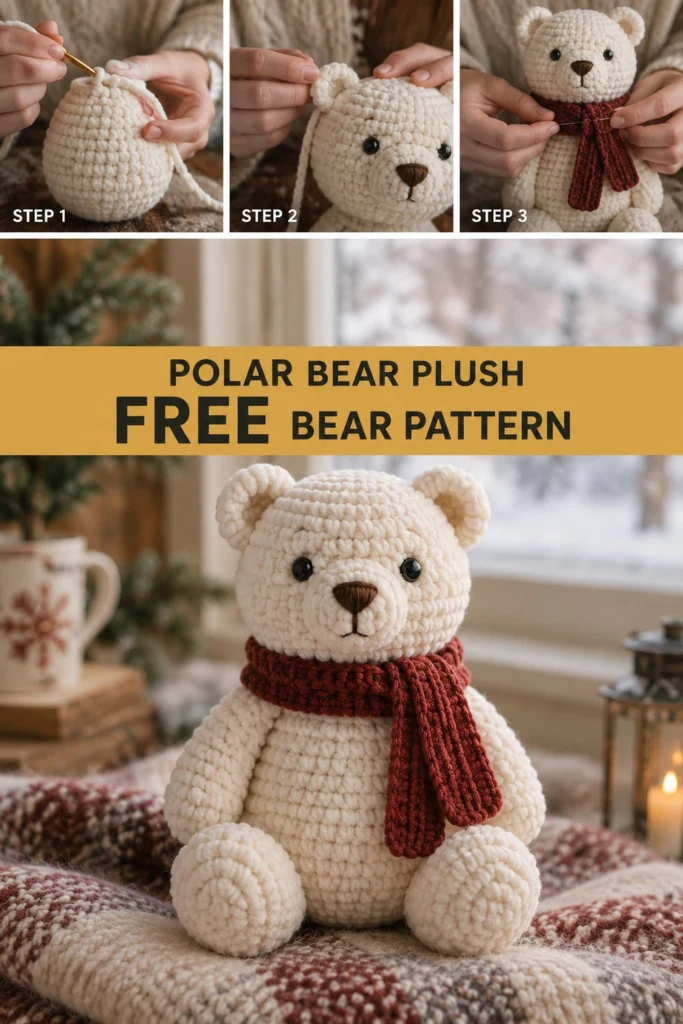
Chenille yarn makes this little bear impossibly soft, and it works up fast because the stitches are chunky. The body and head are one continuous pear shape, the ears go on last, and a slim red scarf gives him somewhere to be this winter.
Little Polar Bear Crochet Amigurumi Free Christmas Pattern
Quick Facts
- Skill level: Intermediate
- Finished size: 9 inches (23 cm) tall sitting down
- Yarn: Super bulky chenille yarn in Cream and Dark Red
- Hook: 4.5 mm (US 7) crochet hook
- Stitches used: ch, sl st, sc, inc, dec
- Time to make: 4 to 6 hours
Size tips and gauge adjustments are included further down the page.
What Makes This Polar Bear Special
Working the body and head as one continuous pear shape gives this little bear a sturdy base that sits upright without flopping over. The plush chenille yarn creates a velvety texture that feels wonderful to hold, while the embroidered facial features make the toy safe for children of all ages. A slim, ribbed dark red scarf wraps neatly around the neck to finish the winter look.
Skill Level
- Working in continuous spiral rounds without joining
- Making magic rings and invisible decreases
- Basic sewing and embroidery techniques
- Reassurance line: If you can master single crochet in the round, you have all the skills needed to complete this project.
Finished Measurements
| Measurement | Inches | Centimeters |
|---|---|---|
| Height (Sitting) | 9.0 in | 23.0 cm |
| Width (Body) | 6.0 in | 15.0 cm |
| Depth | 5.5 in | 14.0 cm |
Materials You Will Need
| Item | Details | Quantity |
|---|---|---|
| Yarn A (Cream) | Super Bulky Chenille Yarn (approx. 70 WPI) | 120 yards / 110 meters |
| Yarn B (Dark Red) | Worsted Weight Yarn (for scarf) | 35 yards / 32 meters |
| Crochet Hook | 4.5 mm (US 7) | 1 |
| Notions | Polyester fiberfill stuffing, tapestry needle, stitch markers, black embroidery floss | As needed |
Yarn Suggestions
| Yarn Line | Weight Category | Skein Yardage | Notes |
|---|---|---|---|
| Premier Yarns Basix Chenille | Super Bulky (6) | 131 yards / 120 meters | Excellent plush texture, minimal shedding |
| Bernat Blanket | Super Bulky (6) | 220 yards / 201 meters | Very soft, widely available |
| Lion Brand Hometown | Bulky (5) | 81 yards / 74 meters | Good alternative if chenille is unavailable |
⚠️ Note: Avoid novelty eyelash yarns or novelty faux-fur yarns for the main body, as they make stitch visibility nearly impossible when working amigurumi rounds.
Gauge
- 10 sc and 11 rows = 4 inches (10 cm) using a 4.5 mm hook in single crochet.
- Rnds 1 to 6 of the body base = 2.5 inches (6.4 cm) across.
Abbreviations
- ch: chain
- sl st: slip stitch
- sc: single crochet
- inc: single crochet increase (2 sc in one stitch)
- dec: invisible single crochet decrease (sc 2 together through front loops only)
- st(s): stitch(es)
- Rnd(s): round(s)
- Row(s): row(s)
- rep: repeat
- FO: fasten off
UK translation note: UK sc = US dc, UK hdc = US tr.
Special Stitches Explained
- Magic Ring: Wrap yarn around your index finger twice to form a loop. Insert hook into center, yarn over, pull up a loop, chain 1, and work the required number of single crochets into the ring. Pull the tail to close securely.
- Invisible Decrease (dec): Insert hook into the front loop only of the next stitch, then insert hook into the front loop only of the following stitch (3 loops on hook). Yarn over and pull through the first 2 loops, yarn over and pull through remaining 2 loops.
Pattern Instructions
Pattern Notes: Work in continuous spiral rounds without joining unless stated otherwise. Use a stitch marker to track the first stitch of each round. Stuff firmly as you go.
Section 1: Body and Head (Cream, make 1)
Start at the base of the body.
– Rnd 1: 6 sc in magic ring (6 sc)
– Rnd 2: inc x 6 (12 sc)
– Rnd 3: (1 sc, inc) x 6 (18 sc)
– Rnd 4: (2 sc, inc) x 6 (24 sc)
– Rnd 5: (3 sc, inc) x 6 (30 sc)
– Rnd 6: (4 sc, inc) x 6 (36 sc)
– Rnd 7: (5 sc, inc) x 6 (42 sc)
– Rnds 8 to 15: sc in each st around (42 sc)
– Rnd 16: (5 sc, dec) x 6 (36 sc)
– Rnds 17 to 19: sc in each st around (36 sc)
– Rnd 20: (4 sc, dec) x 6 (30 sc)
– Rnd 21: sc in each st around (30 sc)
– Rnd 22: (3 sc, dec) x 6 (24 sc)
Begin stuffing the body firmly.
– Rnd 23: (2 sc, dec) x 6 (18 sc)
Now shaping the head:
– Rnd 24: (2 sc, inc) x 6 (24 sc)
– Rnd 25: (3 sc, inc) x 6 (30 sc)
– Rnd 26: (4 sc, inc) x 6 (36 sc)
– Rnds 27 to 32: sc in each st around (36 sc)
– Rnd 33: (4 sc, dec) x 6 (30 sc)
– Rnd 34: (3 sc, dec) x 6 (24 sc)
Stuff the head firmly.
– Rnd 35: (2 sc, dec) x 6 (18 sc)
– Rnd 36: (1 sc, dec) x 6 (12 sc)
– Rnd 37: dec x 6 (6 sc)
FO, leaving a long tail. Weave tail through remaining 6 front loops and pull tight to close.
✅ Checkpoint: Your continuous body-and-head piece should look like a pear shape with a narrower neck constriction between Rnds 22 and 24.
Section 2: Muzzle (Cream, make 1)
- Rnd 1: 6 sc in magic ring (6 sc)
- Rnd 2: inc x 6 (12 sc)
- Rnd 3: (1 sc, inc) x 6 (18 sc)
- Rnd 4: sc in each st around (18 sc)
FO, leaving a long tail for sewing. Lightly stuff before attaching.
Section 3: Ears (Cream, make 2)
- Rnd 1: 6 sc in magic ring (6 sc)
- Rnd 2: inc x 6 (12 sc)
- Rnds 3 to 4: sc in each st around (12 sc)
FO, leaving a long tail. Flatten the open end without stuffing.
Section 4: Arms (Cream, make 2)
- Rnd 1: 6 sc in magic ring (6 sc)
- Rnd 2: (1 sc, inc) x 3 (9 sc)
- Rnds 3 to 8: sc in each st around (9 sc)
FO, leaving a long tail. Lightly stuff the lower half of the arm.
Section 5: Legs (Cream, make 2)
- Rnd 1: 6 sc in magic ring (6 sc)
- Rnd 2: inc x 6 (12 sc)
- Rnd 3: (1 sc, inc) x 6 (18 sc)
- Rnds 4 to 5: sc in each st around (18 sc)
- Rnd 6: 4 sc, dec x 5, 4 sc (13 sc)
- Rnds 7 to 8: sc in each st around (13 sc)
FO, leaving a long tail. Stuff firmly.
Section 6: Scarf (Dark Red, make 1)
Using Yarn B and a 4.5 mm hook, ch 65.
– Row 1: Working in back bumps of chain, hdc in 3rd ch from hook (skipped 2 ch count as first hdc), hdc in each ch across, turn (64 hdc)
– Rows 2 to 3: ch 2 (does not count as st), working in third loop of hdc, hdc in each st across, turn (64 hdc)
FO and weave in ends.
Assembly
- Muzzle: Pin the muzzle centered on the lower half of the head between Rnds 27 and 32. Sew around the edge, adding a little extra stuffing just before closing. Embroider a triangle nose and vertical mouth line using dark brown embroidery floss.
- Eyes: Embroider small horizontal eye stitches with black floss 3 rounds above the muzzle, approximately 5 stitches apart.
- Ears: Sew the ears to the top of the head spanning Rnds 33 to 36, about 6 stitches apart from the center top.
- Arms: Attach the arms to the sides of the upper body just below the neck constriction (Rnds 20 to 22).
- Legs: Sew the legs to the lower sides of the body base so the bear can sit flat.
- Scarf: Wrap the dark red scarf around the bear’s neck, crossing the ends in front. Secure with a few discreet anchor stitches.
Finishing
Weave in all remaining yarn tails securely inside the body. Check that all embroidered features are tightly secured.
Size Customization Tips
To make a larger polar bear, switch to a jumbo-weight chenille yarn and a 6.5 mm hook; each additional increase round in the base adds approximately 1.5 inches to the overall width.
Care Instructions
Hand wash gently in cool water with mild wool detergent. Do not bleach. Lay flat in shade to dry. Do not tumble dry or iron chenille yarn.
FAQ
Can I use safety eyes instead of embroidery?
Yes, you can use 10 mm safety eyes inserted between Rnds 29 and 30, but embroidered eyes are recommended if making this toy for children under 3 years old.
How do I keep my spiral rounds from shifting?
Using a stitch marker at the very first stitch of every round and moving it up on each subsequent round will keep your stitch counts accurate and prevent spiral skewing.
Can I make this bear using standard worsted weight yarn?
Yes, but you will need to reduce your hook size to 3.0 mm and the resulting toy will be much smaller (about 4 inches tall).
Happy Crocheting!
I hope you enjoyed making your little polar bear plush. Be sure to save this pin on Pinterest and leave a comment below sharing what colors you chose for your winter bear!
📄 Your free PDF pattern
⏳ Preparing your free PDF… 30s
Like this one? Save it for later.