Reader Favorites
Japanese Knot Crochet Bag Free Crochet Pattern
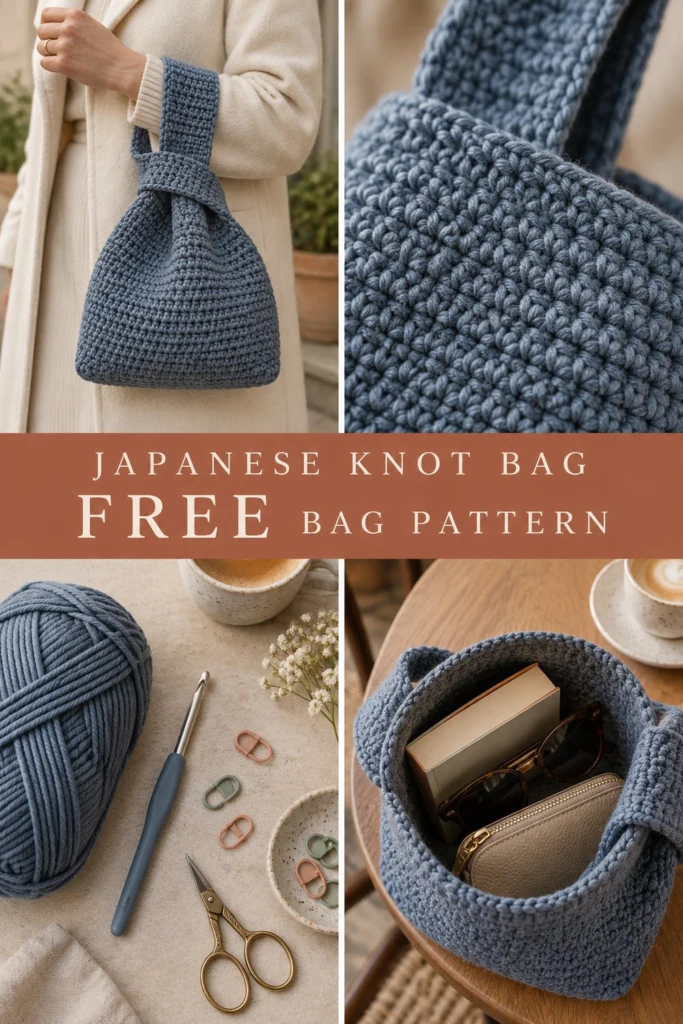
A crochet Japanese knot bag that stays open when you need it and knots itself shut when you pick it up is the ultimate project for makers who love clean design with zero hardware. This free pattern walks you through making two flat half-double crochet panels with integrated handles that slip through one another for an effortless closure.
Japanese Knot Crochet Bag Free Crochet Pattern
Quick Facts
- Skill level: Intermediate
- Finished size: 10 inches wide x 12 inches high (excluding short handle)
- Yarn: Slate blue heavy cotton cord or Aran weight cotton, approx. 450 yards
- Hook: US H/8 (5.0 mm) crochet hook
- Stitches used: ch, sl st, hdc, sc
- Time to make: 5 to 7 hours
Size customization tips are included further down in this guide.
What Makes This Japanese Knot Bag Special
The magic of a Japanese knot bag lies in its asymmetrical handles—one side is short and the other side is long, allowing the long handle to pass through the short handle to close the bag securely. This version is crocheted in two flat panels using sturdy half double crochet stitches, giving it enough structure to hold its shape without needing any lining, zippers, or buttons. The slate blue cotton yarn creates a dense, modern fabric that stands up on its own on a table and easily fits your everyday essentials like a book, sunglasses, and a wallet.
Skill Level
- Required skills: Working flat in rows, working in the round, decreasing, basic seaming.
- Don’t worry if you are new to bags; the step-by-step instructions below will guide you through every turn and seam.
Finished Measurements
| Dimension | Inches | Centimeters |
|---|---|---|
| Width (at widest point) | 10 in | 25.5 cm |
| Height (base to handle split) | 8.5 in | 21.5 cm |
| Total Height (including short handle) | 12 in | 30.5 cm |
Materials You Will Need
| Item | Description | Amount |
|---|---|---|
| Yarn | Slate Blue cotton cord or Aran weight cotton yarn | 450 yds / 411 m |
| Hook | US H/8 (5.0 mm) crochet hook | 1 |
| Notions | Stitch markers, tapestry needle, scissors | As needed |
Yarn Suggestions
| Yarn Line | Skein Yardage | Notes |
|---|---|---|
| Lion Brand 24/7 Cotton | 186 yds / 170 m | Hold double or use a heavy cord equivalent |
| Lily Sugar’n Cream | 120 yds / 109 m | Excellent stitch definition |
| Hobbii Ribbon | 273 yds / 250 m | Gives a sturdy, structured fabric |
⚠️ Note: Avoid stretchy acrylic yarns for this project, as they will stretch out of shape when you place heavy items like books inside the finished bag. Choose non-stretch plant fibers like cotton, linen, or hemp blends.
Gauge
- 14 sts x 12 rows = 4 inches (10 cm) in hdc.
Abbreviations
- ch: chain
- sl st: slip stitch
- hdc: half double crochet
- sc: single crochet
- st(s): stitch(es)
- sk: skip
- rep: repeat
- RS: right side
- WS: wrong side
UK: sc = dc, hdc = htr, dc = tr.
Special Stitches Explained
- Half Double Crochet (hdc): Yarn over, insert hook into stitch, yarn over and pull up a loop (3 loops on hook), yarn over and draw through all 3 loops on hook.
Pattern Instructions
Pattern Notes
- The bag is made in two identical flat panels (Panel A and Panel B), each featuring an integrated handle.
- The short handle is worked directly on one side, and the long handle is worked on the opposite side.
- Turn at the end of each row. Ch 2 at the start of a row does not count as a stitch unless otherwise specified.
Section 1: Panel A (Slate Blue, make 1)
Foundation Chain: Ch 36.
Row 1: Work 1 hdc in 3rd ch from hook (skipped chs count as first hdc), hdc in each ch across, turn. (35 hdc)
Rows 2 to 20: Ch 2, hdc in each st across, turn. (35 hdc)
✅ Checkpoint: At Row 20, your panel should measure approximately 10 inches wide and 6.5 inches high.
Row 21 (Handle Split – Short Side): Ch 2, hdc in first 8 sts, turn leaving remaining sts unworked. (8 hdc)
Rows 22 to 25: Ch 2, hdc in each st across, turn. (8 hdc)
Fasten off short handle, leaving a 6-inch tail.
Row 21 (Handle Split – Long Side): Rejoin yarn to the opposite side of Row 20, leaving 8 unworked sts in the center for the bag opening. Ch 2, hdc in remaining 8 sts, turn. (8 hdc)
Rows 22 to 38: Ch 2, hdc in each st across, turn. (8 hdc)
Fasten off long handle, leaving a 6-inch tail.
Section 2: Panel B (Slate Blue, make 1)
Repeat all instructions for Panel A so you have two identical panels, ensuring the handle placement mirrors your needs or matches Panel A.
Section 3: Assembly
- Lay Panel A and Panel B flat with wrong sides facing together (if there is a distinct side).
- Using a tapestry needle and a length of slate blue yarn, whipstitch or mattress stitch the two side seams from the bottom base up to Row 20 where the handle split begins.
- Seam the bottom base of the bag closed securely.
- Weave in all loose ends.
Section 4: Finishing
To assemble the knot closure:
1. Thread the long handle through the short handle.
2. The bag will naturally cinch closed at the top opening.
3. Block lightly with steam if needed to relax any uneven tension along the side seams.
Size Customization Tips
- To make the bag wider: Add multiples of 2 stitches to your foundation chain. Each extra 2-stitch repeat adds approximately 0.5 inches to the overall width.
- To make the bag taller: Work more straight rows before reaching the handle split (Row 21). Just ensure both panels match in row count.
Care Instructions
Hand wash in cool water with mild wool wash. Lay flat to dry on a towel, reshaping the square base while damp. Do not tumble dry.
FAQ
Can I line this bag with fabric?
Yes! While the heavy cotton yarn keeps its shape well on its own, you can sew a simple cotton rectangle pouch and hand-sew it into the interior lining if you plan to carry small items that might slip through the stitches.
Can I make the long handle longer?
Absolutely. Simply add more rows to the long handle section before fastening off. Just keep in mind that a longer handle will hang lower when knotted.
Is this project beginner-friendly?
Yes, this is a fantastic project for adventurous beginners who are comfortable with basic hdc stitches, turning rows, and simple straight-line seaming.
Happy Crocheting!
I hope you love making and carrying your new Japanese Knot Bag! Be sure to save this pin on Pinterest to your favorite crochet boards, and leave a comment below letting me know what color yarn you chose for yours. Happy stitching!
📄 Your free PDF pattern
⏳ Preparing your free PDF… 30s
Like this one? Save it for later.