Toasted Pumpkin Crochet Pillow Cover Free Thanksgiving Pattern
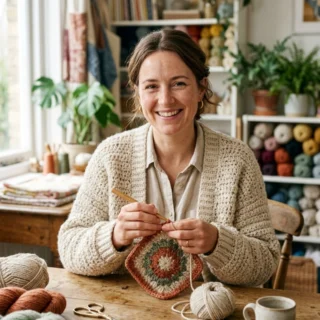
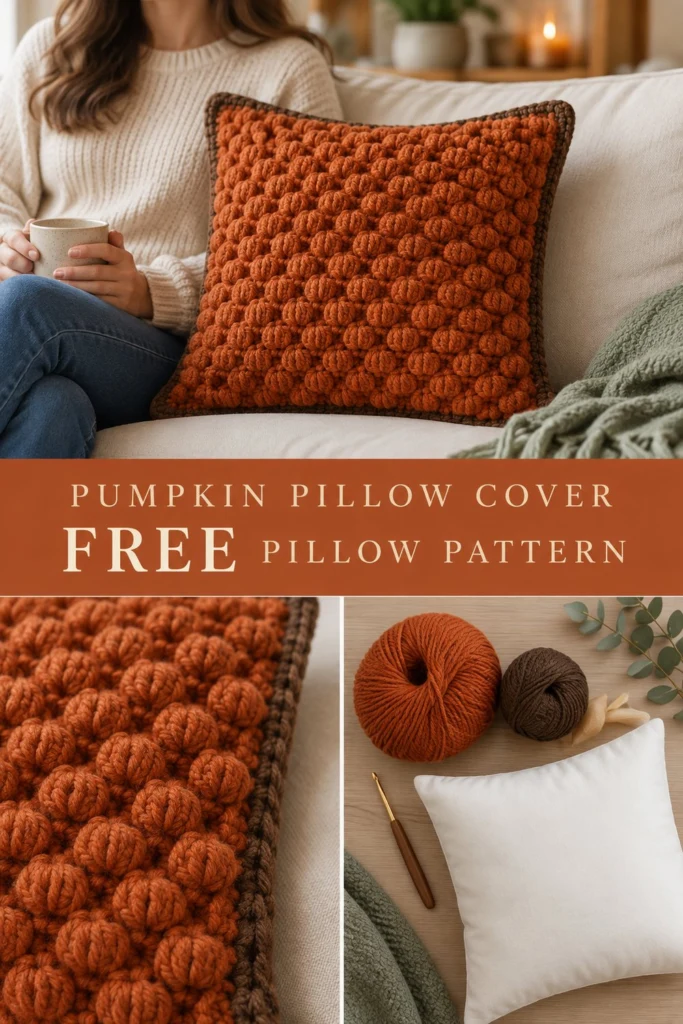
Autumn on the sofa is all about cozy textures, and this toasted pumpkin cushion cover lets you refresh your living room for the season without buying a brand-new pillow. The front panel features a dense bobble stitch field that creates rows of little pumpkin bumps in a rich burnt orange, framed neatly by a chestnut brown border. Designed as a removable cover with a simple envelope back, it slips easily over a standard 45 cm pillow insert with no sewing required to close it shut.
Toasted Pumpkin Crochet Pillow Cover Free Thanksgiving Pattern
Quick Facts
- Skill level: Intermediate
- Finished size: Fits a 45 cm x 45 cm (18 in x 18 in) pillow insert
- Yarn: Worsted weight (Medium #4)
- Hook: 5.0 mm (US H/8)
- Stitches used: ch, sl st, sc, hdc, dc, bobble stitch
- Time to make: Weekend project
Size adjustment tips and custom sizing details are included further down in the guide.
What Makes This Toasted Pumpkin Pillow Cover Special
The standout feature of this design is the bobble stitch texture, which mimics the ridged, bumpy surface of classic autumn pumpkins. Paired with a solid chestnut brown border, the front panel looks polished and intentional. The envelope back features overlapping panels that keep your pillow insert securely tucked inside while allowing you to slip it off effortlessly for washing.
Skill Level
- Familiarity with basic crochet stitches and counting rows
- Ability to work the bobble stitch cleanly across alternating rows
- Comfortable changing yarn colors at the border transition
- Experience making simple flat panels and joining edges
Don’t worry if you are new to textured stitches; the step-by-step instructions below walk you through every row so you can master the pumpkin bumps with ease.
Finished Measurements
| Dimension | Inches | Centimeters |
|---|---|---|
| Width | 18 in | 45 cm |
| Height | 18 in | 45 cm |
Materials You Will Need
| Material | Color | Type / Weight | Amount |
|---|---|---|---|
| Main Yarn | Burnt Orange | Worsted Weight (#4) | 450 yards (410 meters) |
| Border Yarn | Chestnut | Worsted Weight (#4) | 100 yards (90 meters) |
| Hook | — | 5.0 mm (US H/8) | — |
| Notions | — | Yarn needle, scissors, stitch markers | — |
| Insert | — | 45 cm x 45 cm (18 in) pillow insert | 1 insert |
Yarn Suggestions
| Yarn Line | Skein Yardage | Notes |
|---|---|---|
| Lion Brand Vanna’s Choice | 170 yards / 100g | Great stitch definition for textured bobbles |
| Caron One Pound | 815 yards / 454g | Economical choice; one skein of burnt orange covers the front |
| Red Heart Super Saver | 364 yards / 198g | Durable and widely available |
⚠️ Note: Avoid novelty, fuzzy, or eyelash yarns for this project. They obscure the bobble stitch texture and make it difficult to count your stitches accurately.
Gauge
14 sts x 12 rows = 4 in / 10 cm in bobble stitch pattern using a 5.0 mm hook.
Abbreviations
- ch = chain
- sl st = slip stitch
- sc = single crochet
- hdc = half double crochet
- dc = double crochet
- bobble = bobble stitch (5-dc bobble)
- st(s) = stitch(es)
- rep = repeat
- sk = skip
- RS = right side
- WS = wrong side
UK: sc = dc, hdc = htr, dc = tr.
Special Stitches Explained
- Bobble Stitch (5-dc bobble): [Yarn over, insert hook into st, yarn over and pull up loop, yarn over and draw through 2 loops] 5 times in the same stitch, yarn over and draw through all 6 loops on the hook.
- Envelope Back: Two overlapping panels worked in simple single crochet rows that form a pocket opening in the center back of the pillow cover.
Pattern Instructions
Pattern Notes
- The front panel is worked flat in rows with Burnt Orange, then edged with Chestnut.
- The back panels are worked flat in rows using Burnt Orange.
- Turning chains do not count as stitches unless otherwise specified.
Section 1: Front Panel (Burnt Orange, make 1)
Using Burnt Orange, ch 63.
Row 1 (RS): Working in back bumps of foundation chain, sc in 2nd ch from hook and in each ch across (62 sc). Turn.
Row 2 (WS): Ch 1, sc in first st, *bobble in next st, sc in next st; rep from * across *(62 sts: 31 sc, 31 bobbles)*. Turn.
Row 3: Ch 1, sc in each st across (62 sc). Turn.
Rows 4 to 35: Rep Rows 2 and 3 alternately 16 more times (62 sts). Turn.
✅ Checkpoint: At the end of Row 35, your textured square should measure approximately 17 inches across and 17 inches tall before the border is added.
Fasten off Burnt Orange.
Section 2: Front Border (Chestnut, make 1)
With RS facing, join Chestnut with a sl st in top right corner stitch of Front Panel.
Rnd 1: Ch 1, work (1 sc, ch 2, 1 sc) in corner st, work 60 sc across top edge, (1 sc, ch 2, 1 sc) in corner st, work 33 sc evenly down side edge (1 sc per row-end), (1 sc, ch 2, 1 sc) in corner st, work 60 sc across bottom edge, (1 sc, ch 2, 1 sc) in corner st, work 33 sc evenly up side edge; join with sl st to first sc (202 sc, 4 ch-2 corner spaces). Fasten off, leaving a 12 in (30 cm) tail.
Section 3: Back Panels (Burnt Orange, make 2)
Panel Top (make 1)
Using Burnt Orange, ch 63.
Row 1: Sc in 2nd ch from hook and in each ch across (62 sc). Turn.
Rows 2 to 24: Ch 1, sc in each st across (62 sc). Turn.
Fasten off at the end of Row 24, leaving a long tail for assembly.
Panel Bottom (make 1)
Using Burnt Orange, ch 63.
Row 1: Sc in 2nd ch from hook and in each ch across (62 sc). Turn.
Rows 2 to 24: Ch 1, sc in each st across (62 sc). Turn.
Fasten off at the end of Row 24.
Assembly
- Lay the Front Panel flat with the right side facing down (wrong side facing up).
- Place the Back Panel Top over the top portion of the Front Panel, matching outer top and side edges.
- Place the Back Panel Bottom over the bottom portion of the Front Panel, matching outer bottom and side edges, overlapping the top back panel by about 4 to 5 inches in the center.
- Pin all layers together securely around the four outer edges.
- Using the Chestnut yarn tail and a yarn needle, whipstitch through the outer edge stitches around the entire outer perimeter, joining the back panels to the border and securing the envelope overlap in place. Weave in all loose ends.
Finishing
Turn the finished cover right-side out through the center envelope opening, pushing out the corners gently with your fingers. Insert your 45 cm pillow insert into the envelope back.
Size Customization Tips
To adjust this pillow cover for a larger or smaller insert, modify your initial chain in multiples of 2 + 1 to maintain the bobble stitch pattern repeat. Ensure your starting chain matches the width of your target pillow insert minus 1 inch for positive tension fit.
Care Instructions
Remove the pillow insert before washing. Hand wash or machine wash on a gentle cycle in cool water with mild detergent. Lay flat to dry out of direct sunlight. Do not bleach or iron.
FAQ
Can I use a different yarn weight for this pattern?
Yes, but changing the yarn weight will alter your finished dimensions. If you use a lighter yarn, you will need to increase your starting chain and row count to fit a 45 cm insert.
How do I keep my bobbles popping forward?
Make sure you push the bobbles toward the right side (front) of your work after completing the alternate single crochet rows. Working the intervening sc row tightly helps lock the bobbles in position.
Is this pillow cover suitable for beginners?
While it uses basic stitches, the bobble stitch and tension management make this best suited for confident beginners or intermediate crocheters looking to practice texture.
Happy Crocheting!
I hope you enjoy stitching up this cozy toasted pumpkin pillow cover to bring all the autumn warmth into your home. Save this pattern to your Pinterest board for later, and leave a comment below to let me know what colors you chose for your fall decor!